Battle of Ankara
| Battle of Ankara | |
|---|---|
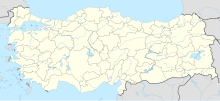
Çubuk plain near Ankara 40°09′N 32°57′E / 40.150°N 32.950°E | |
| Result |
Timurid victory
|
Aq Qoyunlu
Germiyanids
Süleyman Çelebi
Mehmed Çelebi
İsa Çelebi
Musa Çelebi (POW)
Mustafa Çelebi (POW)
Stefan Lazarević
Vuk Lazarević
Đurađ Branković
Gjon Kastrioti
Koja Zaharia
Dhimitër Jonima
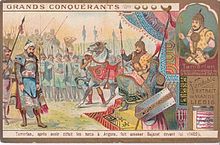
The Battle of Ankara or Angora (
Background
Timur, a
Meanwhile, in 1402, the Ottomans had been campaigning in Europe. Bayezid broke off the blockade of Constantinople and marched to Ankara after Timur again moved his army to the southeast in the summer of 1402.[10]
Troops
It is estimated that the Timurid army counted 140,000,
The Ottoman force included contingents under his sons,
Battle positioning
Bayezid reluctantly withdrew his forces from the blockade of Constantinople and marched them through the midsummer heat. When they arrived, they were tired and thirsty, but were allowed no time to rest or recuperate. Bayezid was advised by his generals to take up defensive positions and, when Timur's forces pushed back the Ottomans, to withdraw into the mountains and force Timur to break ranks and attempt to hunt the Ottomans in their own terrain during the midsummer heat. Bayezid instead chose to take an offensive stance and marched eastward. Advancing Ottoman scouts found no traces of the Timurids, who secretly marched southwest, rested, and were situated to the rear of the Ottomans. The Timurids encamped in the same locations that the Ottomans had previously occupied, making use of abandoned tents and water sources.[15]
In the Timurid army, Timur commanded the centre, his sons Miran and Rukh the right and left, respectively, and his grandsons the vanguard.[10]
In the Ottoman army, Bayezid commanded the centre with Janissaries, his son Suleyman the left flank with the best troops, Stefan Lazarević the right with the Balkan troops, and his son Mehmed the rear guard.[10]

Battle
This section needs additional citations for verification. (December 2020) |

The battle began with a large-scale attack from the Ottomans, countered by swarms of arrows from the Timurid
Aftermath

After the battle, Timur moved through western Anatolia to the Aegean coast, where he
The battle was catastrophic for the Ottoman state, fracturing what remained and bringing almost total collapse of the empire. This resulted in a civil war among Bayezid's sons. The Ottoman civil war continued for another 11 years (1413) following the Battle of Ankara.The battle is also significant in Ottoman history as being the only time a Sultan was captured in person.
See also
Notes
- ^ Anatolian Beyliks and Black Tatars defected to Timurid side during course of the battle.
References
- ISBN 978-1438126760. Archivedfrom the original on 23 January 2023. Retrieved 27 February 2021.
- ^ Yaşar Yüce; Ali Sevim (1991). Türkiye tarihi (in Turkish). Vol. 1. İstanbul: AKDTYKTTK Yayınları. p. 226.
- ^ Nicolle 1983, p. 29.
- ^ a b c Nicolle 1983, p. 29
[t]he sizes of the two armies are reliably estimated at 140,000 on Timur's side and no more than 85,000 under Sultan Bayezid I
- ^ Creasy 1878, p. 47.
- ^ Creasy 1878, pp. 52–55.
- ^ Tucker 2010, p. 139.
- ^ Manz 1998, p. 25.
- ^ Tucker 2010, pp. 139–140.
- ^ a b c d e f g h Tucker 2010, p. 140.
- ^ Edward Gibbon; Henry Hart Milman (1899) The History of the Decline and Fall of the Roman Empire Vol. 6, Peter Fenelon New York: Collier; p. 263
- ^ a b Kafadar 1996, p. 18.
- ^ a b Fine 1994, p. 499.
- ^ a b Fine 1994, p. 422.
- ^ Kinross 1977, p. 74.
- ^ Tucker 2010, p. 141.
- ^ Goody 2004, p. 53.
- ^ Nicholson 2001, p. 54.
Sources
- Creasy, Sir Edward Shepherd (1878). History of the Ottoman Turks, from the beginning of their empire to the present time. New York, Holt.
- Dahmus, Joseph Henry (1983). "Angora". Seven Decisive Battles of the Middle Ages. Burnham Incorporated Pub.
- ISBN 978-0-472-08260-5.
- Goody, Jack (2004). Islam in Europe. Polity Press.
- Grousset, René (1970). The Empire of the Steppes: A History of Central Asia. Rutgers University Press. ISBN 978-0-8135-1304-1.
- Kafadar, Cemal (1996). Between Two Worlds: The Construction of the Ottoman State. University of California Press. pp. 18–. ISBN 978-0-520-20600-7.
- Kastritsis, Dimitris (2007). The Sons of Bayezid: Empire Building and Representation in the Ottoman Civil War of 1402–13. Brill. ISBN 978-90-474-2247-1.
- Kinross, Patrick Balfour Baron (1977). The Ottoman Centuries: The Rise and Fall of the Turkish Empire. Morrow. ISBN 978-0-688-03093-3.
- Manz, Beatrice Forbes (1998). "Temür and the Problem of a Conqueror's Legacy". Journal of the Royal Asiatic Society. Third Series. 8 (1 (Apr)). Cambridge University Press: 21–41. S2CID 154734091.
- Nicholson, Helen J. (2001). The Knights Hospitaller. Boydell Press.
- Nicolle, David (1983). Armies of the Ottoman Turks 1300–1774. Bloomsbury USA. ISBN 978-0-85045-511-3.
- Pears, Edwin (1923). The Ottoman Turks to the Fall of Constantinople. Cambridge University Press. pp. 653–705.
- Tucker, Spencer (2010). "Battle of Ankara". Battles that Changed History: An Encyclopedia of World Conflict. Vol. One. ABC-CLIO. pp. 139–141. ISBN 978-1-59884-429-0.
Journals
- Craig, Simon (2002). "Battle of Ankara: Collision of Empires". Military History. 19 (3): 58–65.
- Knobler, Adam (1995). "The Rise of Tīmūr and Western Diplomatic Response, 1390–1405". Journal of the Royal Asiatic Society. Third Series. 5 (3): 341–349. S2CID 162421202.
- Lopandić, Duško (2011). "Битка код Ангоре" [Battle of Angora]. Политикин Забавник. 3101.
- Şenlen, Sıla (2015). "Ankara Savaşı ve I. Sultan Bayezid'in Timurlenk'e Esir Düşmesinin Sahneye Yansıması" [Dramatic Representation of the Battle of Ankara and Bayezid I’s Captivation by Tamerlane]. OTAM Ankara: 123–133. .
External links
- "Ankara, Battle of" in Encyclopædia Britannica Inc., 15th edn., 1992, Vol. 1, p. 423.

