
Battle of Gazala
| Battle of Gazala | |||||||
|---|---|---|---|---|---|---|---|
| Part of the Second World War | |||||||
 Panzer III and Rommel's command vehicle in the western desert at the time of the Gazala battles. | |||||||
| |||||||
| Belligerents | |||||||
|
|
| ||||||
| Commanders and leaders | |||||||
|
Ettore Bastico Erwin Rommel |
Claude Auchinleck Neil Ritchie | ||||||
| Units involved | |||||||
|
Eighth Army Desert Air Force | |||||||
| Strength | |||||||
|
90,000 men (60,000 Italian, 30,000 German) 560 tanks (228 Italian) 542 aircraft |
110,000 men 843 tanks 604 aircraft | ||||||
| Casualties and losses | |||||||
|
German 3,360 men (26 May – 24 June)[3][b] 400 armoured vehicles damaged or destroyed Italian 3,000 men 125 tanks 44 armoured cars 39 guns 74 anti-tank guns 450 motor vehicles |
50,000[citation needed] killed, wounded or captured (incl. c. 33,000 prisoners at Tobruk)[c] 1,188 armoured vehicles damaged or destroyed | ||||||
| Many damaged tanks were returned to action by both sides | |||||||
The Battle of Gazala (near the village of
The Axis troops made a decoy attack in the north as the main attack moved round the southern flank of the Gazala position. Unexpected resistance at the south end of the line around the
Operation Aberdeen, an attack by the Eighth Army to finish off the Panzerarmee, was poorly co-ordinated and defeated in detail; many British tanks were lost and the Panzerarmee regained the initiative. The Eighth Army withdrew from the Gazala Line and the Axis troops overran Tobruk in a day. Rommel pursued the Eighth Army into Egypt and forced it out of several defensive positions. The Battle of Gazala is considered the greatest victory of Rommel's career.
As both sides neared exhaustion, the Eighth Army checked the Axis advance at the First Battle of El Alamein. To support the Axis advance into Egypt, the planned attack on Malta (Operation Herkules) was postponed. The British were able to revive Malta as a base for attacks on Axis convoys to Libya, greatly complicating Axis supply difficulties at El Alamein.
Background
Benghazi

Following Operation Crusader, in late 1941, the British Eighth Army had relieved Tobruk and driven the Axis forces from Cyrenaica to El Agheila. The Eighth Army advance of 500 mi (800 km) over-stretched its supply lines and in January 1942, the Allies reduced the front line garrison for work on lines of communication and supply dumps, preparatory to another westwards advance against Tripolitania. The elimination of Force K from Malta, which ran into an Italian minefield off Tripoli in mid-December and the arrival of Fliegerkorps II in Sicily, neutralised Allied air and naval forces in Malta, allowing more Axis supplies to reach Libya.[4] After a two-month delay, German and Italian forces in Libya began to receive supplies and reinforcements in men and tanks, which continued until the end of May, when Fliegerkorps II was transferred to the Russian front.[5]
While aware from signals intelligence of these reinforcements, GHQ in Cairo underestimated their significance and Axis fighting strength, having greatly exaggerated the casualties inflicted on the Axis during Operation Crusader.[6] In an appreciation made in January 1942, Auchinleck alluded to an Axis fighting strength of 35,000 men, when the true figure was about 80,000 (50,000 German and 30,000 Italian troops). The Eighth Army expected to be ready by February and GHQ Cairo believed that the Axis would be too weak and disorganised to mount a counter-offensive in the meantime.[7] On 21 January, Rommel sent out three strong armoured columns to make a tactical reconnaissance. Finding only the thinnest of screens, Rommel changed his reconnaissance into an offensive, recaptured Benghazi on 28 January and Timimi on 3 February. By 6 February, the Allies had fallen back to a line from Gazala to Bir Hakeim, a few miles west of Tobruk, from which the Italo-Germans had retired seven weeks before. The Allies had 1,309 casualties from 21 January, lost 42 tanks knocked out, another 30 through damage and breakdowns and forty field guns.[8]
Gazala line
Between Gazala and Timimi, just west of Tobruk, the Eighth Army was able to concentrate its forces sufficiently to turn and fight. By 4 February, the Axis advance had been halted and the front line stabilised from Gazala on the coast 30 mi (48 km) west of Tobruk, to an old Ottoman fortress at Bir Hakeim 50 mi (80 km) inland to the south. The Gazala line was a series of
Prelude
British preparations

Churchill pressed Auchinleck to attack to push the Axis out of Cyrenaica and relieve the pressure on Malta, which Churchill felt was essential to the war effort,
...having particular regard to Malta, the loss of which would be a disaster of the first magnitude to the British Empire and probably fatal in the long run to the defence of the Nile delta.
— Winston Churchill[10]
The Eighth Army received new equipment, including 167 American Lend-Lease M3 Grant tanks equipped with 75 mm guns, and large numbers of 6-pounder anti-tank guns. Rommel thought that Allied minefields ended well north of Bir Hakeim and did not know of the "mine marsh" surrounding the box.[11] The Eighth Army was in the process of reorganising, changing the relationship between infantry and artillery, while the RAF commander Arthur Tedder concentrated the efforts of the Desert Air Force (DAF) on supporting the troops on the ground. Army commanders lost the power to direct air operations, which was reserved for the air commanders. A new fighter-bomber concept was developed and Air Vice-Marshal Arthur Coningham, commander of the DAF, moved his headquarters to the Eighth Army HQ to improve communication.[12]
Axis commanders knew that the entry of the United States into the war would give the Eighth Army access to an increase in materiel but sought to forestall an Allied offensive before these supplies could influence events. By late May, the
Axis preparations

The Axis retreat to El Agheila after Operation Crusader reduced the supply distance from Tripoli to 460 mi (740 km). The discovery of 13,000 long tons (13,000 t) of fuel at Tripoli eased the supply crisis, despite the delivery of only 50,000 long tons (51,000 t) of supplies in January. The Panzerarmee had a much shorter supply line and the British were burdened by an over-extended supply line. Luftflotte II in Sicily had also regained air superiority for the Axis. Rommel asked for another 8,000 lorries but this unrealistic demand was rejected and Rommel was warned that an advance would cause another supply crisis. On 29 January, the Panzerarmee recaptured Benghazi and next day ammunition supply to the front line failed. By 13 February, Rommel agreed to stop at Gazala, 900 mi (1,400 km) from Tripoli.[15]
Until May, monthly deliveries averaged 60,000 long tons (61,000 t), less than the smaller Axis force received from June–October 1941 but sufficient for an offensive. The 900 mi (1,400 km) advance to Gazala succeeded because Benghazi was open, reducing the transport distance for about 33 percent of the supplies of the Panzerarmee to 280 mi (450 km). The Italians tried to restrain Rommel by advocating the capture of Malta, which would postpone another offensive in Africa until the autumn but agreed to an attack on Tobruk for late May. An advance would stop at the Egyptian frontier, another 150 mi (240 km) east and the Luftwaffe would redeploy for Operation Herkules. The capture of Malta would not alter the constraints of port capacity and distance; protecting convoys and a large port close to the front, would still be necessary for victory.[16]

Air attacks directed by Kesselring against Malta greatly reduced its offensive capacity, allowing supply convoys from Italy to reach Axis forces in Africa with increased regularity.
The rest of the
Battle
Operation Venice

At 14:00 on 26 May, the Italian X and XXI Corps launched a frontal attack on the central Gazala positions, after a heavy artillery concentration, beginning Unternehmen Venezia (Operation Venice).[d] A few elements of the Afrika Korps and XX Mobile Corps were attached to these assault groups. During the day, the bulk of the Afrika Korps moved, to give the impression that this was the main Axis assault. When night fell, the armoured formations turned south in a sweeping move around the southern end of the Gazala line.[24]
In the early hours of 27 May, Rommel personally led the elements of Panzerarmee Afrika, the
Further to the east, the 15th Panzer Division had engaged the 4th Armoured Brigade of the 7th Armoured Division, which had been ordered south to support the 3rd Indian and 7th Motorised brigades. In a mutually costly engagement, the Germans were surprised by the range and power of the 75 mm guns on the new M3 (Grant) tanks.[31][32] The 4th Armoured Brigade then withdrew toward El Adem and spent the night near the Belhamed supply base, east of El Adem. By late morning, the Axis armoured units had advanced more than 25 mi (40 km) north but by noon had been stopped by the 1st Armoured Division in more mutually costly fighting.[31]

On the far right of the Axis advance, the 90th Light Afrika Division engaged the 7th Motorised Brigade at Retma and forced it to withdraw eastwards on Bir el Gubi.
The tank battle continued for three days; lacking possession of Bir Hakeim, Rommel drew the Afrika Korps into a defensive position, using the extensive Allied mine belts to block an Allied approach from the west. The British tanks attacked several times from the north and east against accurate defensive fire. The Axis supply situation became desperate; defending the German rear, the Ariete Division repulsed attacks by the British armoured brigades on 29 May and during the first week of June.[36]
Bir Hakeim
The Bir Hakeim box was defended by the 1st Free French Brigade under Marie-Pierre Kœnig. On 27 May, the Italian IX Tank Battalion of the 132nd Tank Infantry Regiment (Ariete Division), which had not been engaged in the destruction of the 3rd Indian Brigade box and had continued to advance alone at full speed, stumbled in the French positions and launched a hasty attack, which was a costly failure against the French 75 mm guns and mines.[37][38][39] On the night of 1/2 June, the 90th Light and Trieste divisions were sent south to renew the attack on Bir Hakeim, where the battle continued for another ten days.[40]
Our attacks repeatedly bogged down in the excellent French fortifications. During the first ten days of out [sic] attack against the French the British had remained amazingly calm. The Ariete Division alone was attacked by them on 2 June but it defended itself stubbornly. After a counter-attack by the 21st Panzer Division the situation there again became quiet.
— Generalmajor Alfred Toppe[40]
Reinforced with a further kampfgruppe, the Axis attacked Bir Hakeim again on 9 June and overran the defences by the following day.[41] Ritchie ordered the remaining troops to evacuate as best they could, under the cover of darkness.[42] Under fire through the night, many of the French were able to find gaps in the line through which to withdraw. The survivors then made their way some 5.0 mi (8 km) to the west, to rendezvous with transport from the 7th Motor Brigade. About 2,700 troops (including 200 wounded) of the original garrison of 3,600 escaped and about 500 French troops, many of whom were wounded, were captured when the 90th Light Division occupied the position on 11 June.[43][44]
The Cauldron
Early on 29 May, supply vehicles supported by the Trieste and Ariete divisions, worked through the minefield north of Bir Hakeim and reached the Afrika Korps. On 30 May, Rommel pulled the Afrika Korps back westward against the edge of the minefields, creating a defensive position. A link was formed with elements of the Italian X Corps, which were clearing two routes through the minefields from the west.
In the afternoon [30th May] I personally reconnoitred the possibilities for an attack on Got el Ualeb [the Sidi Muftah box] and detailed units of the Afrika Korps, 90th Light Division and the Italian Trieste Division for an assault on the British positions next morning. The attack was launched on the morning of the 31st May. German-Italian units fought their way forward yard by yard against the toughest British resistance imaginable.[...] Nevertheless, by the time evening came we had penetrated a substantial distance into the British positions. On the following day the defenders were to receive their quietus. After heavy Stuka attacks, the infantry again surged forward against the British field positions.[...] Piece by piece the elaborate British defences were won until by early afternoon the whole position was ours. The last British resistance was quenched. We took in all 3,000 prisoners and destroyed or captured 101 tanks and armoured cars, as well as 124 guns of all kinds.
— Rommel[46]

Acting on mistaken reports about German tank losses, Auchinleck strongly urged Ritchie to counter-attack along the coast, to exploit the absence of German tanks and break through to Timimi and then Mechili. Ritchie was more concerned by Tobruk, brought reinforcements up to the El Adem box and created new defensive boxes opposite the gaps in the minefield.[47] Ritchie ordered the Eighth Army to counter-attack against the Afrika Korps on 5 June but they were met by accurate fire from tank and anti-tank guns positioned in the cauldron. In the north, XIII Corps made no progress but the attack by 7th Armoured and 5th Indian divisions on the eastern flank of the cauldron at 02:50 initially went well. An important element of the plan was the destruction of the Axis anti-tank screen with an artillery bombardment but because of an error in plotting its position, the bombardment fell too far to the east.[48] When the 22nd Armoured Brigade advanced, it was met by massed anti-tank fire and checked. The 32nd Army Tank Brigade, advancing from the north, joined the attack at dawn but also ran into massed fire, losing fifty of seventy tanks.[49]

By early afternoon on 5 June, Rommel split his forces, deciding to attack east with the Ariete and 21st Panzer divisions while he sent elements of 15th Panzer Division northwards against the Knightsbridge Box. The eastward thrust towards Bir el Hatmat dispersed the tactical HQs of the two British divisions, as well as the HQs of the 9th Indian Infantry Brigade, the 10th Indian Infantry Brigade and other smaller units, which caused command to break down. The 22nd Armoured Brigade, having lost 60 of its 156 tanks, was forced from the battlefield by more attacks from the 15th Panzer Division. Three Indian infantry battalions, a reconnaissance regiment and four artillery regiments of the attacking force were left behind, unsupported by armour and overrun. Rommel retained the initiative, maintaining his strength in the cauldron while the number of operational British tanks diminished. A number of probes were sent to test the various opposing strong points and from 6 to 8 June, further attacks were launched on Bir Hakeim and repulsed by the French garrison. The 7th Motor Brigade and 29th Indian Infantry Brigade continued to harass the Axis lines of communications.[50]
Black Saturday, 13 June

On 11 June, Rommel pushed the 15th Panzer Division and 90th Light Afrika Division toward El Adem and by 12 June had begun forcing the 201st Guards Brigade out of the Knightsbridge Box to Tobruk.[34] The 29th Indian Infantry Brigade repulsed an attack on the El Adem box on 12 June but the 2nd and 4th Armoured Brigades on their left were pushed back 3.7 mi (6 km) by the 15th Panzer Division and had to leave their damaged tanks on the battlefield. On 13 June, the 21st Panzer Division advanced from the west and engaged the 22nd Armoured Brigade. The Afrika Korps demonstrated a superiority in tactics, combining tanks with anti-tank guns in the attack; Rommel acted rapidly on intelligence obtained from Allied radio traffic intercepts.[51] By the end of the day, the British tank strength had been reduced from 300 tanks to about 70 and the Afrika Korps had established armour superiority and a dominating line of positions, making XIII Corps on the Gazala line vulnerable to being cut off.[52] By the end of 13 June, the Knightsbridge box was virtually surrounded and it was abandoned by the Guards Brigade later that night, with their commanding officer Thomas Bevan having been killed the previous day.[53][54] Due to these defeats, 13 June became known as "Black Saturday" to the Eighth Army.[55]
Rigel Ridge
On 13 June, the 21st Panzer Division attacked Rigel Ridge in the middle of a sandstorm.
Eighth Army retreat
On 14 June, Auchinleck authorised Ritchie to withdraw from the Gazala Line. The defenders in the El Adem and two neighbouring boxes held on and the 1st South African Division was able to withdraw along the coast road, practically intact.[59] The road could not accommodate two divisions and the remaining two brigades of the 50th (Northumbrian) Division could not retreat eastwards because of the Axis tanks and attacked south-west, breaking through the lines of the 27th Infantry Division "Brescia" and 17th Infantry Division "Pavia" of X Corps; then headed south into the desert, before turning east.[60] London would not contemplate a withdrawal to the better defensive positions on the Egypt–Libya frontier and on 14 June, Auchinleck ordered to Ritchie to hold a line running south-east from Acroma (west of Tobruk) through El Adem to Bir El Gubi. By the evening of 15 June, the defensive box at Point 650 had been overrun and on 16 June, the defenders at Point 187 had been forced by lack of supplies to evacuate. The defensive boxes at El Adem and Sidi Rezegh were also attacked by the Afrika Korps. On 17 June, both boxes were evacuated, ending any chance of preventing the encirclement of Tobruk. Ritchie ordered the Eighth Army to withdraw to Mersa Matruh, about 100 mi (160 km) east of the frontier, leaving Tobruk to threaten the Axis lines of communication as in 1941.[61] The retreat became known to some as the Gazala Gallop.[62]
Fall of Tobruk

In February 1942, the army, navy and air force commanders-in-chief in Cairo had agreed that Tobruk should not stand another siege. Auchinleck viewed the defence of Tobruk as a lesser matter and told Ritchie that he did not intend to hold it at all costs.
Operation Venice (Unternehmen Venezia) began on 26 May 1942 and drove the Eighth Army east of Tobruk, leaving it vulnerable to attack from the east.
Aftermath
Analysis

With the capture of Tobruk, the Axis gained a port nearer the Aegean–Crete route and a large amount of Allied supplies. If the Allies could not stop the Germans in Egypt, they would take the Suez Canal (forcing Britain to use supply lines twice as long, threatened by U-boats) and potentially drive for the oilfields in the Middle East. Hitler rewarded Rommel with a promotion to the rank of field-marshal, the youngest German officer ever to achieve this rank.[69] Rommel remarked he would have preferred another panzer division.[70]
Churchill wrote,
This was one of the heaviest blows I can recall during the war. Not only were its military effects grievous, but it had affected the reputation of the British armies.
— Winston Churchill[71]
Auchinleck dismissed Ritchie on 25 June and assumed command of the Eighth Army for the
In 2017, James Holland wrote,
As Rommel said to a captured British officer, 'What difference does it make if you have two tanks to my one, when you spread them out and let me smash them in detail?' That one sentence really did encapsulate the nub of the matter and the failure of the Auk's approach. Frankly, he and his senior commanders should have known better by now.[74]
Casualties
The Eighth Army lost 50,000 men killed,[citation needed] wounded or captured, including c. 35,000 prisoners taken at Tobruk.[75][76] The Germans suffered 3,360 casualties, about 15 per cent of their force.[77][3] Italian casualties were 3,000 men, 125 tanks, 44 armoured cars, 450 motor vehicles, 39 guns and seventy-four 47 mm anti-tank guns.[78] On 30 June, the Afrika Korps reported that Axis tank losses were c. 400 and that only 44–55 German tanks were operational, the Italian XX Corps was down to fifteen tanks and the 90th Light Afrika Division had only 1,679 men left.[79][80] The Eighth Army lost thousands of tons of supplies, nearly 800,000 rounds of artillery ammunition, nearly 13 million rounds of small-arms ammunition and a huge number of tanks. Hundreds of damaged tanks had been left behind when armoured regiments retreated and it was estimated that there were 1,188 tank casualties in 17 days. On 22 June, the Desert Air Force had 463 operational aircraft, 420 of them in the Middle East, the Germans 183 and the Italians 238, with another 174 in reserve and 500 in the Mediterranean excluding Italy.[81] The Royal Army Ordnance Corps recovered 581 tanks up to 19 June, repaired 278 and sent 222 back to Egypt (326 being US-made tanks). The Eighth Army was reduced to about 185 operational tanks by the end of the battle and shuffling operational tanks and crews between units disrupted unit organisation. Seven field artillery regiments, 6,000 lorries and two tank repair workshops (which had been moved into Tobruk) were lost. By 1 July, the Eighth Army was back at El Alamein, with 137 serviceable tanks, 42 en route from workshops and 902 tanks waiting to be repaired.[82][83]
Subsequent operations
Panzerarmee Afrika began Unternehmen Aïda an advance upon Egypt, while the Eighth Army fell back to El Alamein. Auchinleck decided not to hold Mersa Matruh, choosing to fight a delaying action with X and XIII Corps. The Afrika Korps was delayed at the Battle of Mersa Matruh but signal failures led to disorganisation and the X Corps line of retreat along the coast road being cut off. The corps broke out at night to the south and worked its way around the German positions, collided with Axis forces several times and lost more than 6,000 prisoners, forty tanks and a large quantity of supplies.[84] Auchinleck had ordered the bulk of the Eighth Army to retire another 99 mi (160 km) to El Alamein, 62 mi (100 km) from Alexandria. The retirements brought the Eighth Army closer to its base and the Qattara Depression to the south of El Alamein closed the southern flank. The Allied and Axis forces fought the First Battle of El Alamein, the Battle of Alam el Halfa and the Second Battle of El Alamein. (Operation Agreement, a British landing at Tobruk during the night of 13/14 September, to rescue Allied prisoners, was a failure.[85]
Orders of battle
Allied and Axis forces, Gazala, 26 May – 21 June 1942
Allies
- Middle East Command (Claude Auchinleck)
- 1st South African Division (Dan Pienaar)
- South African 1st Infantry Brigade Group
- South African 2nd Infantry Brigade Group
- South African 3rd Infantry Brigade Group
- 2nd South African Division (Hendrik Klopper) (in Tobruk)
- South African 4th Infantry Brigade Group
- South African 6th Infantry Brigade Group
- 9th Indian Infantry Brigade Group (Bernard Fletcher) (from 5th Indian Division and moved to 7th Armoured Division at the Cauldron in early June)
- 11th Indian Infantry Brigade (Andrew Anderson) (from Army Reserve to replace 9th Indian Infantry Brigade Group)
- William Ramsden)
- 150th Infantry Brigade Group (Haydon)
- 151st Infantry Brigade Group (John Nichols)
- 69th Infantry Brigade Group(Hassall)
- 1st Army Tank Brigade (O'Carroll)
- 32nd Army Tank Brigade(Willison)
- Charles Norrie)
- 1st Armoured Division (Herbert Lumsden)
- 2nd Armoured Brigade Group (Briggs)
- 22nd Armoured Brigade Group (Carr)
- 201st Guards Motor Brigade (John Marriottuntil 17 June then G. F. Johnson)
- 7th Armoured Division (Frank Messervy)
- 4th Armoured Brigade Group(Gatehouse)
- 7th Motor Brigade Group (James Renton)
- 3rd Indian Motor Brigade Group (Filose)
- 5th Indian Infantry Division
- Marie Kœnig) (under 7th Armoured Division command when defending Bir Hakeim)[34]
Army Reserve
- 5th Indian Infantry Division (Harold Briggs)
- 10th Indian Infantry Brigade (Charles Boucher)
- 2nd Free French Brigade Group
- 10th Indian Infantry Division (Thomas Rees) (arriving from Iraq)
- 20th Indian Infantry Brigade (MacGregor)
- 21st Indian Infantry Brigade (Purves)
- 25th Indian Infantry Brigade (Ronald Mountain)
- 11th Indian Infantry Brigade (Andrew Anderson) (from 4th Indian Infantry Division)
- 1st Armoured Brigade
- 5th Indian Infantry Brigade from mid-June (Dudley Russell) (from 4th Indian Infantry Division)
Axis
Details from Pitt 2001 unless indicated.[86]
- Comandante Superiore: Generale d'Armata (Ettore Bastico)
Panzer Armee Afrika (Generaloberst Erwin Rommel)
- Walter Nehring)
- Gustav von Värst [wounded 27 May then Oberst Eduard Crasemann])
- 21st Panzer Division (Generalmajor Georg von Bismarck)
- 90th Light Division (Generalmajor Ulrich Kleemann)
- Corpo d'Armata di Manovra XX (Generale di Corpo d'Armata Ettore Baldassarre)
- 132nd Armoured Division "Ariete" (Generale di Divisione Giuseppe De Stefanis)
- 101st Motorised Division "Trieste" (Generale di Divisione Arnaldo Azzi)
Infanteriegruppe Crüwell (Ludwig Crüwell)[e]
- Corpo d'Armata X (Generale di Corpo d'Armata Benvenuto Gioda)
- 27th Infantry Division "Brescia" (Generale di Divisione Giacomo Lombardi)
- 17th Infantry Division "Pavia" (Generale di Divisione Antonio Franceschini)
- Corpo d'Armata XXI (Generale di Corpo d'Armata Enea Navarini)
- 102nd Motorised Division "Trento" (Generale di Divisione Francesco Scotti)
- 60th Infantry Division "Sabratha" (Generale di Divisione Mario Soldarelli)
- Light Infantry Regiment 155 (detached from 90th Light Division)
See also
- Battle of Bir Hakeim
- List of Italian military equipment in World War II
- List of German military equipment of World War II
- List of British military equipment of World War II
- List of French military equipment of World War II
- List of equipment of the United States Army during World War II
- North African campaign timeline
- List of World War II Battles
Footnotes
- M3 Grants from the American 1st Armored Division under Major Henry Cabot Lodge Jr. were placed under British command and achieved a number of victories during fighting near Acroma on 11 June.[1] Time recorded these as the first Americans to engage German land forces in the war.[2]
- ^ 300 officers, 570 NCOs and 2,490 other ranks.[3]
- ^ 19,000 British, 10,720 South African and 2,500 Indian troops.[3]
- ^ Rommel's plan (issued as "Order for Army Operations", 20 May) to encircle the Allied Army deployed between Gazala and Bir Hakeim and capture the fortress of Tobruk, was initially called Operation Theseus (Unternehmen Theseus).Venezia was the code name (funk befehl Venezia) of the last-minute adjustment (evening of 26 May) for the entire motorised Axis force to advance south of Bir Hakeim.[21][22][23]
- ^ Gruppe Crüwell was part of Panzerarmee Afrika but Rommel temporarily split the force in half, Crüwell commanding the infantry formations along the original front line, while Rommel joined the mobile forces in the flanking move. After Crüwell was captured on 29 May 1942, Gruppe Crüwell was placed under the temporary command of Field Marshal Albert Kesselring, who had been visiting the front.[87]
Citations
- ^ Yeide 2006, p. 52.
- ^ Time 1942.
- ^ a b c d Playfair 2004a, p. 274.
- ^ Hinsley 1981, pp. 324–325.
- ^ Hinsley 1981, pp. 348, 418.
- ^ Hinsley 1981, pp. 335–336.
- ^ Hinsley 1981, pp. 334, 330.
- ^ Playfair 2004a, pp. 139–153.
- ^ Playfair 2004a, pp. 197–198, 216–217.
- ^ Lewin 1998, p. 109.
- ^ Lewin 1998, p. 112.
- ^ Clifford 1943, pp. 237–238.
- ^ a b Barr 2005, p. 13.
- ^ a b Carver 2002, p. 167.
- ^ Creveld 1977, pp. 192–193.
- ^ Creveld 1977, pp. 193–195.
- ^ Lewin 1998, p. 108.
- ^ a b Playfair 2004a, p. 223.
- ^ Toppe 1990, pp. A-8-18–19.
- ^ Mackenzie 1951, p. 541.
- ^ Stumpf 2001, pp. 602–613.
- ^ Montanari 1993, p. 199.
- ^ Rondeau 2013, p. 169.
- ^ Toppe 1990, pp. A-8-19.
- ^ Parri 2009, p. 111.
- ^ Montanari 1993, p. 208.
- ^ Carver 1964, p. 219.
- ^ Ford 2005, p. 35.
- ^ Greene & Massignani 1994, p. 156.
- ^ Montanari 1993, p. 206.
- ^ a b Playfair 2004a, p. 224.
- ^ Toppe 1990, p. A-8-25.
- ^ Playfair 2004a, pp. 223–224.
- ^ a b c Mead 2007, p. 298.
- ^ Playfair 2004a, pp. 224–225.
- ^ Walker 2003, pp. 117–121.
- ^ Walker 2003, pp. 116–117.
- ^ Clifford 1943, p. 247.
- ^ Montanari 1993, p. 211.
- ^ a b Toppe 1990, p. A-9-1.
- ^ Toppe 1990, pp. A-9-5–A-9-7.
- ^ Clifford 1943, pp. 260–262.
- ^ Playfair 2004a, p. 237.
- ^ Toppe 1990, p. A-9-6.
- ^ Playfair 2004a, pp. 226–228.
- ^ Rommel 1953, p. 212.
- ^ Mackenzie 1951, p. 548.
- ^ Hinsley 1981, p. 373.
- ^ Playfair 2004a, pp. 232–233.
- ^ Playfair 2004a, pp. 233–236.
- ^ Mellenthin 1971, p. 107.
- ^ Hoffman 2004, p. 77.
- ^ Playfair 2004a, p. 234.
- ^ McCrery 2011, pp. 104–105.
- ^ Clifford 1943, p. 264.
- ^ Playfair 2004a, pp. 242–243.
- ^ Mitcham 2007, p. 98.
- ^ Greene & Massignani 1994, p. 163.
- ^ Mackenzie 1951, pp. 554–555.
- ^ Clifford 1943, pp. 269–272.
- ^ Mackenzie 1951, pp. 556–561.
- ^ Nash 2013, p. 182; Sadler 2015, p. 18.
- ^ Playfair 2004a, p. 261.
- ^ Bierman & Smith 2003, p. 178.
- ^ a b Mackenzie 1951, pp. 561, 559.
- ^ a b Harper 2017, p. 23.
- ^ Carver 2002, p. 123.
- ^ Horn & Katz 2016, p. 194.
- ^ Playfair 2004a, p. 275.
- ^ Rommel 1953, p. 233.
- ^ Barr 2005, p. 1.
- ^ Playfair 2004a, pp. 285, 331–357.
- ^ Playfair 2004a, pp. 367–370.
- ^ Holland 2017, p. 207.
- ^ Barr 2005, p. 16.
- ^ Ford 2005, p. 10.
- ^ Carver 1964, p. 249.
- ^ Montanari 1989, p. 291.
- ^ Ellis 2001, p. 57.
- ^ Barr 2005, p. 39.
- ^ Playfair 2004a, p. 283.
- ^ Playfair 2004a, pp. 238–239.
- ^ Barr 2005, pp. 39–40.
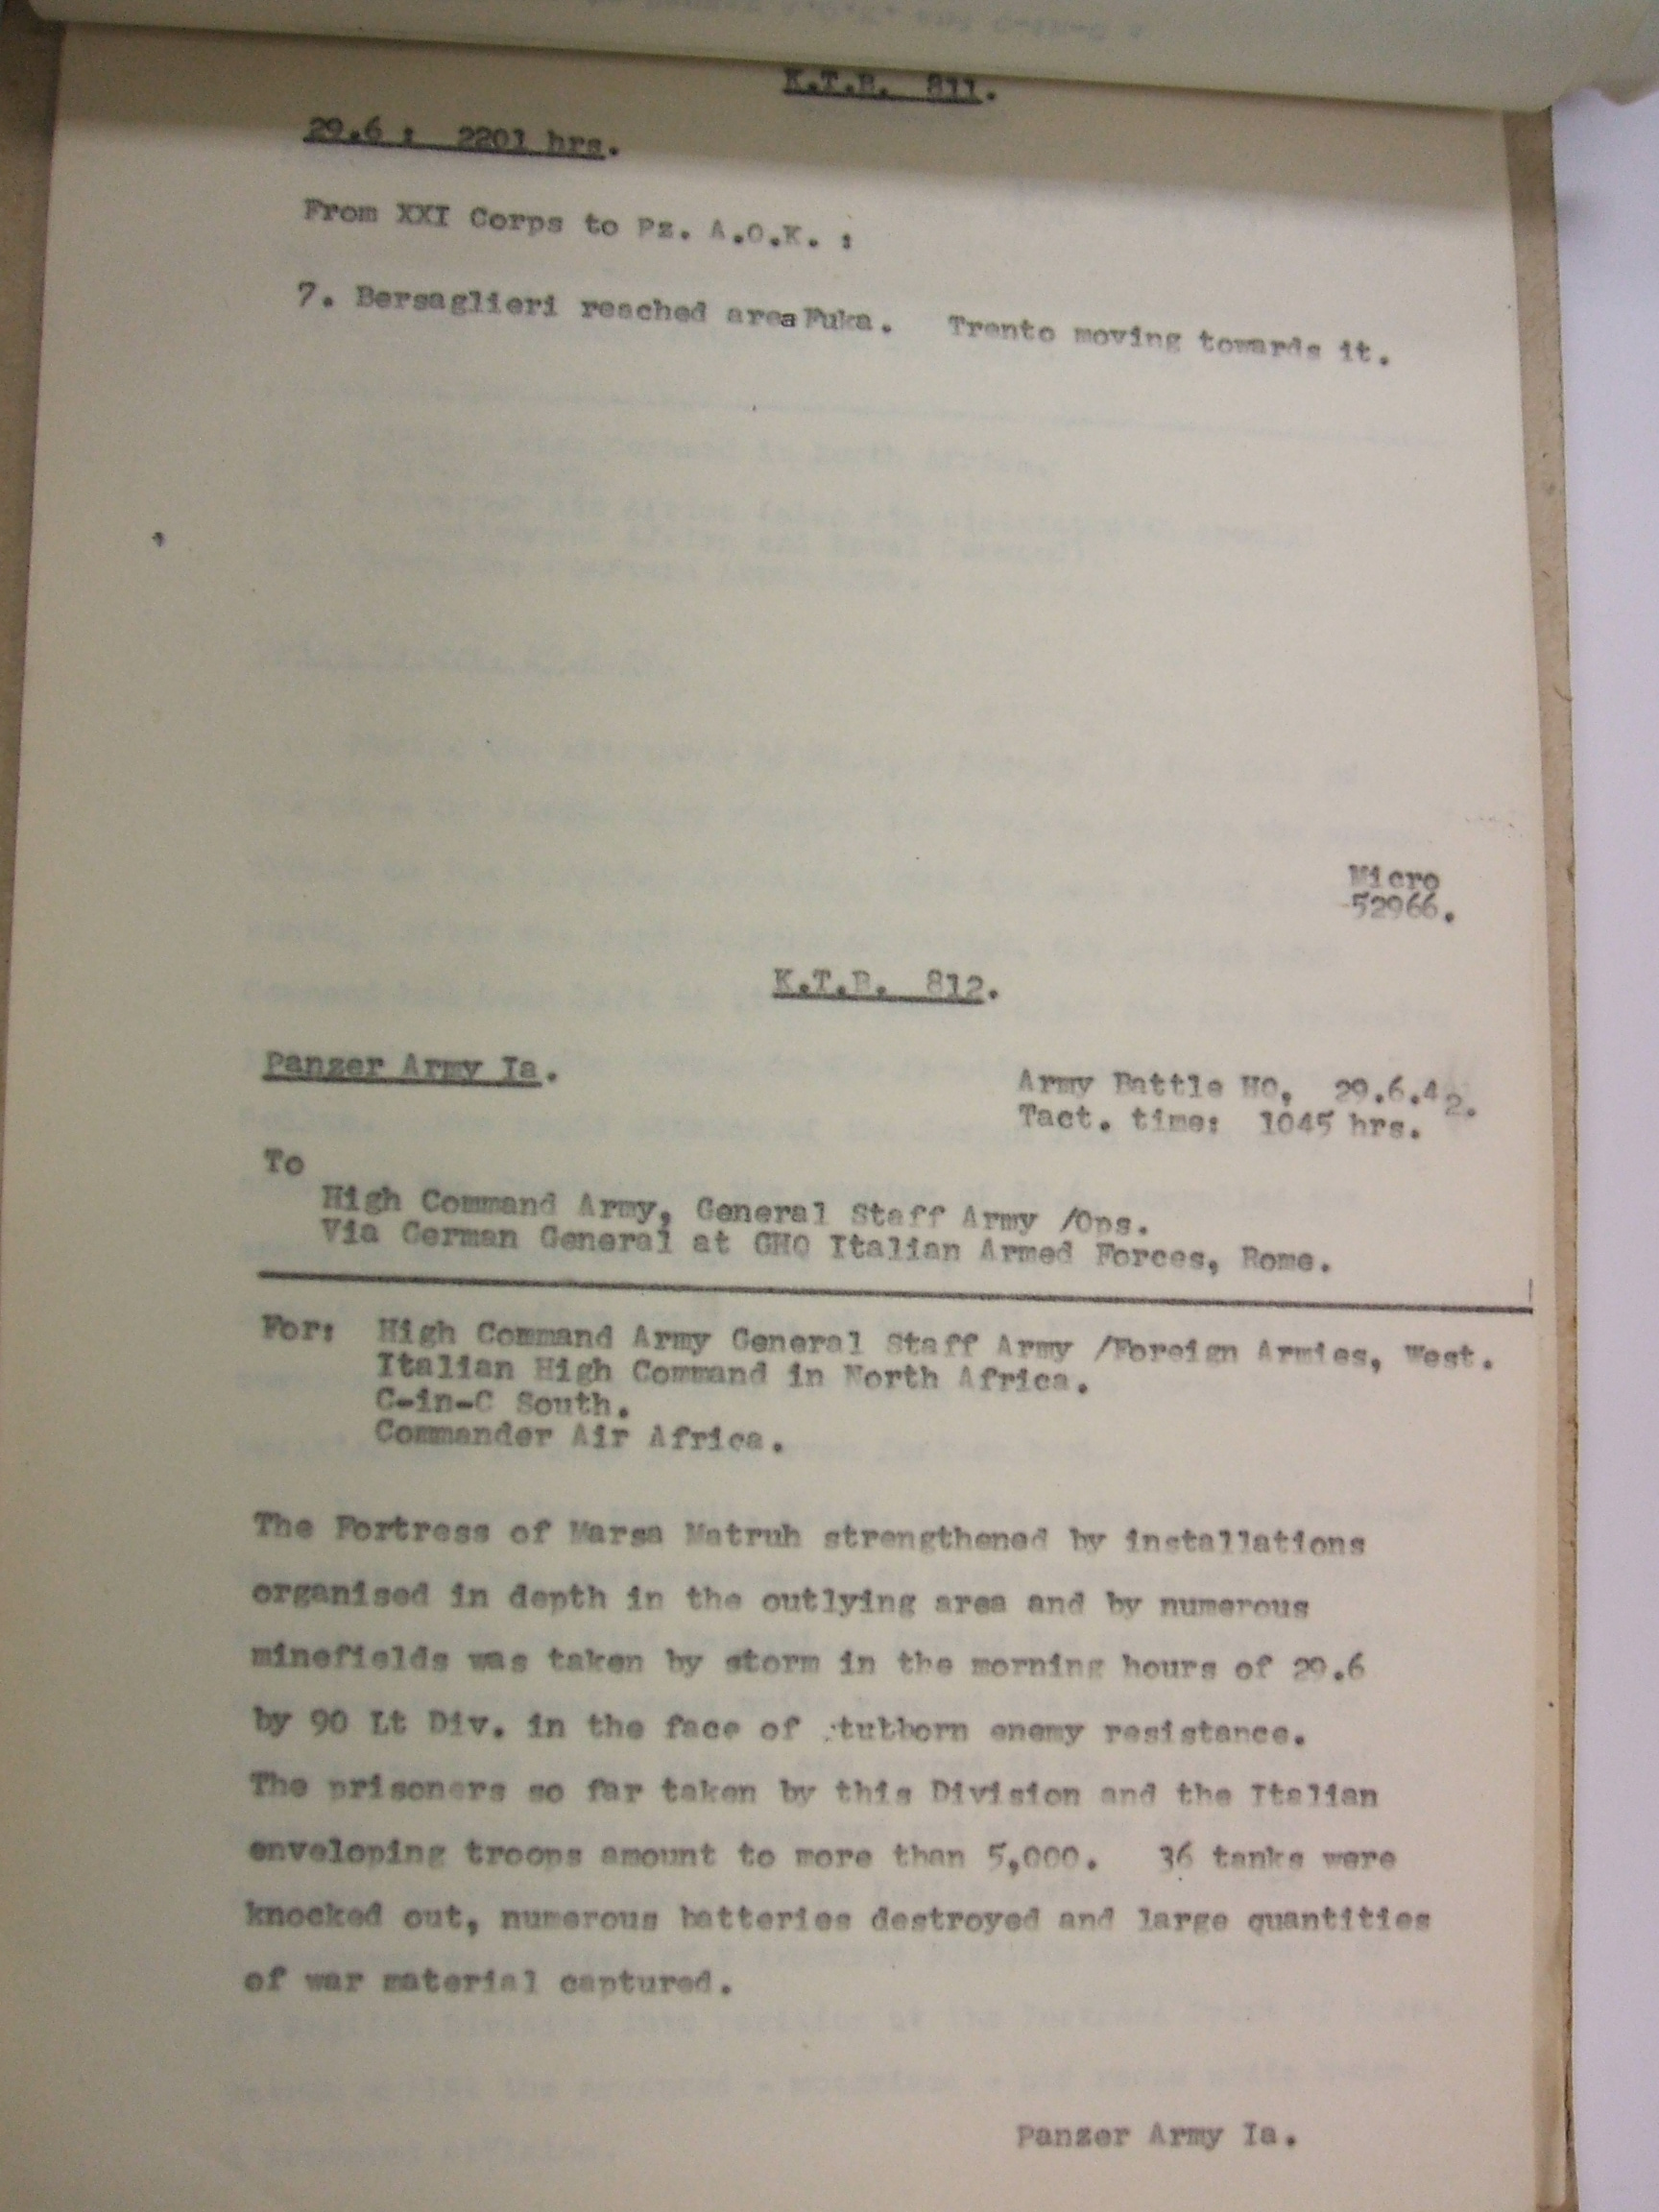
- ^ Panzer Army Africa Battle Report dated 29 June 1942 K.T.B. 812 page 1 Archived 30 October 2008 at the Wayback Machine and page 2 Archived 25 March 2009 at the Wayback Machine
- ^ Playfair 2004, pp. 20–23.
- ^ Pitt 2001, pp. 347–348.
- ^ Playfair 2004a, pp. 227–228.
Bibliography
Books
- Barr, Niall (2005). Pendulum of War: The Three Battles of El Alamein. Woodstock NY: Overlook. ISBN 1-58567-738-8.
- Bierman, John; Smith, Colin (2003) [2002]. Alamein; War Without Hate. New York: Penguin Books. ISBN 0-670-91109-7.
- ISBN 0-330-23376-9.
- Carver, M. (2002) [1986]. Dilemmas of the Desert War: The Libyan Campaign 1940–1942 (2nd pbk. Spellmount ed.). Staplehurst: Batsford. ISBN 978-1-86227-153-1.
- OCLC 186758297.
- ISBN 0-521-29793-1.
- Ellis, Chris (2001). 21st Panzer Division: Rommel's Afrika Korps Spearhead. Shepperton: Ian Allan. ISBN 0-7110-2853-2.
- Ford, Ken (2005). Gazala 1942: Rommel's Greatest Victory. Oxford: Osprey. ISBN 978-1-84603-264-6.
- Greene, J.; Massignani, A. (1994). Rommel's North Africa Campaign: September 1940 – November 1942. Conshohocken, PA: Combined Books. ISBN 0-58519-391-6.
- Harper, Glyn (2017). The Battle for North Africa: El Alamein and the Turning Point for World War II. Bloomington, IN: Indiana University Press. ISBN 978-0-253-03142-6.
- Hinsley, F. H.; et al. (1981). British Intelligence in the Second World War. Its Influence on Strategy and Operations. History of the Second World War. Vol. II. London: ISBN 0-11-630934-2.
- Hoffman, Karl (2004). Erwin Rommel. London: Brassey's. ISBN 1-85753-374-7.
- ISBN 978-0-593-07167-0.
- Lewin, Ronald (1998) [1968]. Rommel As Military Commander. New York: B&N Books. ISBN 978-0-7607-0861-3.
- OCLC 59637091.
- McCrery, Nigel (2011). The Coming Storm: Test and First-Class Cricketers Killed in World War Two. Vol. II. Pen and Sword. ISBN 978-1-5267-0698-0.
- Mead, Richard (2007). Churchill's Lions: A Biographical Guide to the Key British Generals of World War II. Stroud: Spellmount. ISBN 978-1-86227-431-0.
- ISBN 0-345-24440-0.
- Mitcham, S. (2007). Rommel's Lieutenants: The Men who Served the Desert Fox, France, 1940. Westport, CN: Praeger. ISBN 978-0-27599-185-2.
- Montanari, Mario (1989). El Alamein (gennaio – novembre 1942) [El Alamein (January–November 1942)]. Le operazioni in Africa Settentrionale (in Italian). Vol. III (online ed.). Roma: Stato Maggiore dell'esercito, Ufficio Storico. from the original on 26 July 2020. Retrieved 24 January 2020 – via issuu.
- Montanari, Mario (1993). El Alamein (gennaio – novembre 1942) [El Alamein (January–November 1942)]. Le operazioni in Africa Settentrionale (in Italian). Vol. III. Roma: Stato Maggiore dell'esercito, Ufficio Storico. OCLC 313319483.
- Nash, N.S. (2013). Strafer Desert General: The Life and Killing of Lieutenant General WHE Gott CB CBE DSO MC. Barnsley: Pen and Sword. ISBN 978-1-78159-090-4.
- Parri, Maurizio (2009). Tracce di Cingolo - Storia dei Carristi 1917–2009 [Track Traces - History of the Tankers 1917–2009]. Roma: Associazione Nazionale Carristi d'Italia/Commandante 132° Reggimento Carri. Archived from the original on 6 December 2019. Retrieved 6 December 2019 – via docplayer.
- Pitt, Barrie (2001) [1980]. The Crucible of War: Auchinleck's Command (2nd pbk. Cassell, London ed.). London: Jonathan Cape. ISBN 0-304-35951-3.
- ISBN 1-845740-67-X.
- Playfair, I. S. O.; Flynn, F. C.; Molony, C. J. C. & Gleave, T. P. (2004) [1966]. Butler, Sir James (ed.). The Mediterranean and Middle East: The Destruction of the Axis Forces in Africa. History of the Second World War, United Kingdom Military Series. Vol. IV. Uckfield, UK: Naval & Military Press. ISBN 978-184574-068-9.
- Rommel, Erwin (1953). Liddell Hart, B. H. (ed.). The Rommel Papers (1982 ed.). New York: Da Capo Press. ISBN 978-0-306-80157-0.
- Rondeau, Benoit (2013). Afrikakorps, L'Armée de Rommel [Afrikakorps, The Army of Rommel] (in French). Paris: Tallandier. OCLC 851936614.
- Sadler, John (2015). Ghost Patrol: A History of the Long Range Desert Group, 1940–1945. Oxford: Casemate. ISBN 978-1-61200-336-8.
- Stumpf, Reinhard (2001) [1990]. "Part V The War in the Mediterranean 1942–43: Operations in North Africa and in the Central Mediterranean". The Global War Widening of the Conflict into a World War and the Shift of the Initiative 1941–1943. Das Deutsche Reich und der Zweite Weltkrieg. Vol. VI. Translated by Osers, Ewald; Brownjohn, John; Crampton, Patricia; Willmot, Louise (eng. trans. Cambridge University Press, London ed.). Stuttgart: Deutsche Verlags-Anstalt for the Militärgeschichtlichen Forschungsamt. ISBN 0-19-822888-0.
- Toppe, Alfred (1990) [~1947]. German Experiences in Desert Warfare During World War II. FMFRP 12-96. Vol. II. Washington: Headquarters, U.S. Marine Corps. OCLC 23705039.
- Walker, I. W. (2003). Iron Hulls, Iron Hearts: Mussolini's Elite Armoured Divisions in North Africa. Marlborough: Crowood Press. ISBN 978-1-86126-646-0.
- Yeide, Harry (2006). Weapons of the Tankers: American Armor in World War II. St. Paul, MN: Zenith Press. ISBN 978-0-7603-2329-8.
Journals
- Horn, Karen; Katz, David (2016). "The Surrender of Tobruk in 1942: Press Reports and Soldiers' Memories". Scientia Militaria. 44 (1): 190–208. from the original on 10 November 2019. Retrieved 1 December 2019.
Magazines
- "Massachusetts: For Services Rendered". Time. New York. 20 July 1942. from the original on 24 October 2017. Retrieved 19 May 2018.
Websites
- "The History of the British 7th Armoured Division: The Desert Rats: Engagements 1942". May–June 1942. Archived from the original on 10 August 2015. Retrieved 13 March 2015.
Further reading
- Agar-Hamilton, J. A. I.; Turner, L. F. C. (1952). Crisis in the Desert: May–July 1942. Vol. II (1st ed.). Cape Town: Oxford University Press. OCLC 776803251.
- French, David (2000). Raising Churchill's Army: The British Army and the War against Germany 1939–1945. Oxford: Oxford University Press. ISBN 0-19-820641-0.
- Dando, N. (2014). The Impact of Terrain on British Operations and Doctrine in North Africa 1940–1943 (PhD). Plymouth University. OCLC 885436735.
- Marshall, Charles F. (2002) [1994]. The Rommel Murder: The Life and Death of the Desert Fox. Mechanicsburg, PA: Stackpole Books. ISBN 0-8117-2472-7.
- Molinari, Andrea; Anderson, Duncan (2007). Desert Raiders: Axis and Allied Special Forces 1940–43. Oxford: Osprey. ISBN 978-1-84603-006-2.