
Road signs in the Netherlands
This article has multiple issues. Please help improve it or discuss these issues on the talk page. (Learn how and when to remove these template messages)
|

The road signs of the Kingdom of the Netherlands (the Netherlands and six Dutch Caribbean islands), as well as Suriname,[1] are regulated in the Reglement verkeersregels en verkeerstekens 1990, commonly abbreviated as RVV 1990. While most previous signage, from the RVV 1966 (Dutch) remained legal and official, they have been updated / replaced. Some aren't official anymore and have lost legal validity, but most surviving old signs remained valid.
Speed restrictions
-
 A1: Speed limit (50 km/h)
 -
 A2: End of speed limit (50 km/h)
 -
 A3: Speed limit displayed on an electronic display panel
 -
 A4: Recommended speed
 -
 A5: End of recommended speed


Priority
-
 B1: Priority road (formally used
 -
 B2: End of priority road
 -
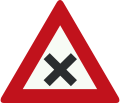
 B3: Crossroads with priority
 -
 B4: Road junction with priority over minor road from the left
 -
 B5: Road junction with priority over minor road from the right
 -
 B6:Give Way sign, must give priority to other traffic on the main road ahead
 -
 B7: Stop: Give priority to traffic on the main road ahead (formerly used
 )
)


Road closed prohibition and mandatory
-
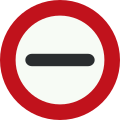
 C1: Road closed in both directions to vehicles, riders and persons in charge of animals or livestock
 -
 C2: No entry in this direction for vehicular traffic, horse riders and persons in charge of animals or livestock
 -
 C3: One-way street
 -
 C4: One-way street
 -
 C5: Access permitted for both sides
 -
 C6: No access for vehicles with more than two wheels (formerly used
 )
) -
 C7: No access for goods vehicles (formerly used
 )
) -
 C7a: Closed to buses
 -
 C7b: Closed to buses and goods vehicles
 -
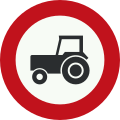 C8: No access for agricultural vehicles. (formerly used
 )
) -
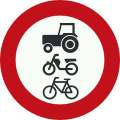 C9: No access for riders, cattle, wagons, agricultural vehicles, microcars, bicycles, mopeds or invalid carriages
 -
 C10: No access for motor vehicle towing trailers (formerly used
 )
) -
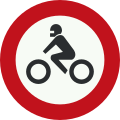 C11: No access for motor cycles (formerly used
 )
) -
 C12: No access for motor vehicles (formerly used
 )
) -
 C13: No access for mopeds, motor-assisted bicycles or motor-powered invalid carriages (formerly used
 )
) -
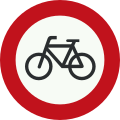 C14: No access for bicycles or for non-motor-powered invalid carriages (formerly used
 )
) -
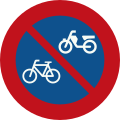
 C15: No access for bicycles, mopeds and invalid carriages (formerly used
 )
) -
 C16: No access for pedestrians (formerly used
 )
) -
 C17: No access for vehicles or combinations of vehicles with a length, including the load, greater than indicated (formerly used
 )
) -
 C18: No access for vehicles with a width, including the load, greater than indicated
 -
 C19: No access for vehicles with a height, including the load, greater than indicated
 -
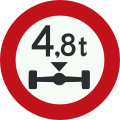 C20: No access for vehicles with an axle load greater than indicated
 -
 C21: No access for vehicles or combinations of vehicles with a total weight greater than indicated
 -
 C22: No access for vehicles carrying hazardous substances
 -
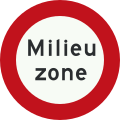 C22a: Environmental zone: no access for vehicles not compliant with article 86d of RVV 1990
 -
 C22b: End of environmental zone
 -
 C23-01: Rush-hour lane open
 -
 C23-02: Clear rush-hour lane
 -
 C23-03: Rush-hour lane closed


.svg)


Signs giving positive instructions
-
 D1: Roundabout – give way to vehicles on the immediate left
 -
 D2: Instruction to all drivers to keep to the right of the sign (or left if arrow is reversed)
 -
 D3: The sign may be passed on either side
 -
 D4: Instruction to drive ahead only (formerly used
 )
) -
 D5: Instruction to follow the direction ahead shown by the arrow (formerly used
 or
or  )
) -
 D6: Instruction to follow one of the directions ahead shown by the arrows (formerly used)
 -
 D7: Instruction to follow one of the directions ahead shown by the arrows


Parking and stopping
-
 E1: No parking
 -
 E2: No parking and stopping
 -
 E3: No parking for bicycles or mopeds
 -
 E4: Parking area
 -
 E5: Taxi rank
 -
 E6: Parking for disabled drivers
 -
 E7: Parking permitted for the immediate loading and unloading of goods only
 -
 E8: Parking facilities only for the category or group of vehicle shown
 -
 E9: Parking for permit-holders only
 -
 E10: Entrance to controlled parking zone
 -
 E11: End of controlled parking zone
 -
 E12: Park and ride facilities
 -
 E13: Parking facilities for car sharers


Other signs giving orders
-
 F1: motor vehicles on more than two wheels are not allowed to overtake another vehicle on more than two wheels
 -
 F2: End of no overtaking zone
 -
 F3: No overtaking of cars by lorries
 -
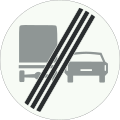 F4: End of zone with no overtaking of cars by lorries
 -
 F5: Give way to oncoming vehicles
 -
 F6: Priority over oncoming vehicles
 -
 F7: No U-turns (formerly used
 )
) -
 F8: End of all restrictions imposed by traffic signs
 -
 F9: End of all restrictions imposed by electronic signalling panels
 -
 F10: Stop. The sign can also contain further information as to whom it is directed and why
 -
 F11: Compulsory use of passing lane for slow motor vehicles (under 25 km/h)
 -
 F12: End of passing lane for slow motor vehicles
 -
 F13: Bus lane
 -
 F14: End of bus lane
 -
 F15: Tram lane
 -
 F16: End of tram lane
 -
 F17: Bus and tram lane
 -
 F18: End of bus and tram lane
 -
 F19: Compulsory use of lane only for trucks and buses
 -
 F20: End of lane only for trucks and buses
 -
 F21: Compulsory use of lane only for trucks
 -
 F22: End of lane only for trucks


Traffic regulations
-
 G1:Motorway
 -
 G2: End of motorway
 -
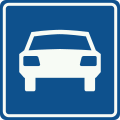 G3: Expressway (formerly used
 )
) -
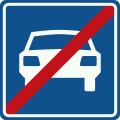 G4: End of Expressway (formerly used
 )
) -
 G5: Living street (formerly used
 )
) -
 G6: End of Living street (formerly used
 )
) -
 G7: Footpath (formerly used
 )
) -
 G8: End of footpath
 -
 G9: Bridleway
 -
 G10: End of bridleway
 -
 G11: Route for pedal cycles only (formerly used
 )
) -
 G12: End of pedal cycles route
 -
 G12a: Route for pedal cycle and mopeds only
 -
 G12b: End of route for pedal cycles and mopeds
 -
 G13: Optional cycle path (formerly used
 )
) -
 G14: End of optional cycle path


Built-up area
-
 H1: Built-up area
 -
 H2: End of built-up area
Warning signs
-
 J1: Uneven road
 -
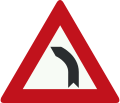
 J2: Bend to right
 -
 J3: Bend to left
 -
 J4: Double bend, first to right
 -
 J5: Double bend, first to left
 -
 J6: Steep hill upward
 -
 J7: Steep hill downward
 -
 J8: Dangerous crossing
 -
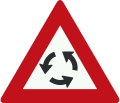 J9: Roundabout
 -
 J10: Level crossing with barrier or gates ahead
 -
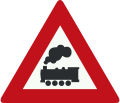 J11: Level crossing without barrier or gates ahead (formerly used
 )
) -
 J12: Level crossing with single track
 -
 J13: Level crossing with two or more tracks
 -
 J14: Tram (crossing) ahead (formerly used
 )
) -
 J15: Opening or swing bridge ahead (formerly used
 )
) -
 J16: Road works ahead (formerly used
 )
) -
 J17: Road narrows on both sides
 -
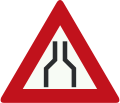
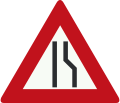 J18: Road narrows on the right side
 -
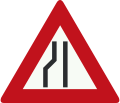 J19: Road narrows on the left side
 -
 J20: Slippery road (formerly used
 )
) -
 J21: School crossing (formerly used
 )
) -
 J22: Pedestrian crossing (formerly used
 )
) -
 J23: Pedestrians
 -
 J24: Cyclists and moped riders (formerly used
 )
) -
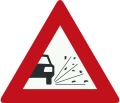 J25: Loose chippings (formerly used
 )
) -
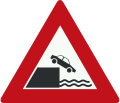 J26: Quayside or river bank (formerly used
 )
) -
 J27: Wild animals
 -
 J28: Livestock
 -
 J29: Two-way traffic
 -
 J30: Low-flying aircraft
 -
 J31: Side winds (formerly used
 )
) -
 J32: Traffic lights
 -
 J33: Queues likely (formerly used
 )
) -
 J34: Danger of accidents
 -
 J35: Reduced visibility because of snow, rain or fog (formerly used)
 -
 J36: Risk of ice or snow
 -
 J37: Danger. Details of the danger are shown on the plate beneath (formerly used
 )
) -
 J38: Warning bump
 -
 J39: Warning for retractable bollard (poller) in the traffic lane that can be used to regulate access to streets and areas.
 -
 level crossing distance board(close)
 -
 level crossing distance board(between)
 -
 level crossing distance board(far)


Direction
-
 K1: Low level motorway information sign showing both main and intermediary destinations and the motorway number (old)
 -
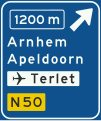 K2: Advance warning sign of a motorway showing the distance to the next exit and destinations after the exit (the top destination is the name of the exit), direction to aerodrome/airport and the road number (non-motorway)(old)
 -
 K3: Information sign for exit to motorway service area, showing the name of the rest area and symbols for the services offered (old)
 -
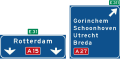 K4: High level motorway information sign showing lane instructions for through traffic and exit panel showing intermediary destinations, with the motorway number and European route numbers (old)
 -
 K5: Non-motorway advance information panel showing intermediary destinations, road numbers, a viaduct symbol and a sign for an industrial zone
 -
 K6: Non-motorway information panels showing intermediary destinations and non-motorway road numbers
 -
 K7: Signposts for cyclists and moped riders (finger posts) showing local and intermediary destinations, municipal cycle route numbers (above) and showing intermediary destinations and intermediary cycle route numbers (below)
 -
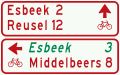 K8: Signposts (multiple) for cyclists and moped riders showing intermediary destinations and indicating an alternative route (in italics) to one of the destinations
 -
 K9: Diversion with alternative route shown on an advance warning panel for a non-motorway highway
 -
 K10: Advance warning panel within a built-up area showing an intermediary destination, local destinations, local tourist sights, local facilities and road numbers through the town
 -
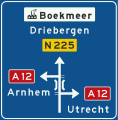
 K11: Lane instructions on a non-motorway highway. Panel showing intermediary destinations, road numbers and directions to a motorway
 -
 K12: Local signpost within a built-up area showing names of individual districts (in traffic areas)
 -
 K13: Signpost within a built-up area showing district numbers (in traffic areas)
 -
 K14: Route for the conveyance of hazardous materials


Information
-
 L1: No vehicles over height shown, underpass
 -
 L2: Pedestrian crossing (formerly used
 )
) -
 L3a: Tram stop/bus stop
 -
 L3b: Bus stop
 -
 L3c: Tram stop
 -
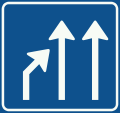
 L4: Get in lane
 -
 L5: End of lane
 -
 L6: Lane fork
 -
 L7: Number of through lanes
 -
 L8: No through road for vehicles (formerly used
 )
) -
 L9: Advance warning of a no through road for vehicles
 -
 L10: Advance warning of traffic information for the direction shown
 -
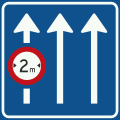 L11: Information on panel applies only to the lane(s) indicated
 -
 L12: Information on panel applies only to the lane indicated
 -
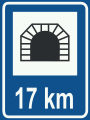 L13: Model sign traffic tunnel
 -
 L14: Hard shoulder
 -
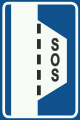 L15: Hard shoulder equipped with emergency telephone and fire extinguisher
 -
 L16: Emergency telephone
 -
 L17: Fire extinguisher
 -
 L18: Emergency telephone and fire extinguisher
 -
 L19: Nearest exit or second nearest exits in the directions and at the distances indicated on the sign
 -
 L20: Passing area on right-hand side of the road
 -
 L21: Passing area on left-hand side of the road
 -
 Road Barriers


Retired signs (no longer used)
Below, signs are withdrawn or replaced with new diagrams of the same meaning.
Attention signs
Priority
-
 B1: Priority road (1941-1990)
 -
 B1: Priority road (1941-1950)
 -
 B2: End of priority road (1950-1990)
 -
 B7: Stop: Give priority to traffic on the main road ahead (1950-1966)
 -
 B7: Stop: Give priority to traffic on the main road ahead (1966-1979)
.svg)

.svg)

.svg)
Road closed prohibition and mandatory
-
 C6: No access for vehicles with more than two wheels (1966-1990)
 -
 C7: No access for goods vehicles (1966-1990)
 -
 C8: No access for motor vehicles that cannot exceed 25 km/h (1966-1990)
 -
 no pedestrians
 -
 Pedestrians only


_Rotterdam_(2020).jpg)

Traffic regulations
-
 G3: Expressway (1941-1966)
 -
 G4: End of Expressway (1941-1966)
 -
 G3: Expressway (1966-1990)
 -
 G4: End of Expressway (1966-1990)
 -
 G5: Living street (1966-1988)
 -
 G6: End of Living street (1966-1988)
 -
 G5: Living street (1988-1990)
 -
 G6: End of Living street (1988-1990)


.svg)
.svg)
Warning Signs
-
 J37: Danger
 -
 J24: Cyclist crossing
 -
 OB618: Uneven road, larger trucks or other big vehicles may get stuck. This sign is placed before a railroad crossing.
.svg)


Information
-
 L2: Pedestrian crossing (1966-1990)
 -


References
- Dutch colonial history, lasting into 1975.