New Zealand Mounted Rifles Brigade
| New Zealand Mounted Rifles Brigade | |
|---|---|
First World War
William Meldrum | |
| Insignia | |
| Unit colour patch | |
| Abbreviation | NZMRB |
The New Zealand Mounted Rifles Brigade was a
The brigade was formed from three regiments – the
By the end of 1914, the brigade had arrived in
As of 2022 one mounted rifles unit (Queen Alexandra's Mounted Rifles) is retained in the modern New Zealand Army.
Background

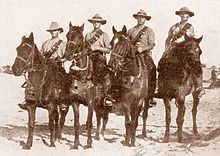
On 4 August 1914, the British Empire declared war on the German Empire. Two days later, to assist the war effort, New Zealand offered to send a New Zealand Expeditionary Force (NZEF) to fight alongside the British Army. That offer was accepted by the Imperial Cabinet and amongst the troops asked for was a mounted infantry brigade. Which became known as the New Zealand Mounted Rifles Brigade.[3] Being mounted infantry the brigade was expected to ride to the site of the battle, then dismounted and fight on foot, just like normal infantry.[4]
The brigade's first
Formation
|
New Zealand Mounted Rifles Brigade
|
Initially, in 1914, the brigade comprised a Brigade Headquarters, three mounted regiments, the
Training in New Zealand
In New Zealand, the brigade's reinforcements trained at Featherston Camp north east of Wellington where about 8,000 men were housed in nearly 300 buildings, including three billiard rooms, a post office, a cinema, sixteen dining halls, six cook-houses and stables for 500 horses. The training programme included eight weeks of dismounted drill, two weeks of shooting, eight weeks of mounted drill and lectures on sanitation, military law and discipline, animal management and stable duties. All mounted reinforcements had to pass confirmatory riding tests before being cleared to go overseas.[12] Once trained the men were sent to Sydney or Melbourne in Australia, where they embarked on Australian troopships bound for Suez.[13]
Egypt
A little over two months after the declaration of war, in October 1914, the brigade sailed from New Zealand.
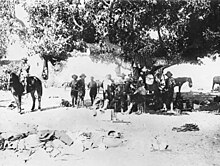
The brigade used their time training, which consisted of day and night marches through the desert, combined with rifle and machine-gun practice.[19] Culminating in
a four-day exercise, in February, when they marched around twenty-five miles (40 km) each day.
Gallipoli

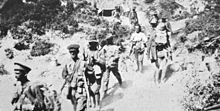
The brigade's transport ships arrived off Gallipoli on 12 May. The troops were kept on board until dark, then landed at
Defence of Walker's Ridge
In May intelligence reports indicated that Turkish reinforcements were grouping around the ANZAC positions, preparing an attack.

No.3 Post
On 27 May the brigade realised the Turks were building a new position, at the base of the foothills, around 450 yards (410 m) east of the No.2 Post and when completed it would be a danger to the New Zealand post. So it would have to be captured and the task was given to the 1st Squadron, Canterbury Mounted Rifles. The squadron assembled at No.2 Post and after dark, at 22:00, 28 May assaulted the position, and by 23:30 had forced the Turkish defenders to withdraw.[34][35]
Once secured the 6th Squadron Wellington Mounted Rifles, carrying spades and picks to improve the defences, moved in to occupy the position. Now known as No.3 Post, the squadron was ordered to "hold the post till relieved".

Chunuk Bair
The objective of the British August offensive was to seize Chunuk Bair, a high point in the Sari Bair mountain range. The New Zealand and Australian Division would provide the attacking force. The initial part of the attack was to clear the Turks from the foothills, which was given to the New Zealand Mounted Rifles Brigade, reinforced by a Māori Pioneer Battalion.[44]
The attack began over the night of 5/6 August the Auckland Mounted Rifles successfully captured the Old No.3 Post.[45] To their left the Canterbury and Otago Mounted rifles without firing a shot, only using their bayonets, cleared the Chailak Dere valley, then advanced to Aghyl Dere in the north. Capturing Taylor's Hollow, Walden's Point, and finally Beauchop Hill.[46] To the right the Wellington Mounted Rifles and the Māoris captured Destroyer Ridge, and then scaled the north-east face of Table Top and at 22:55 attacked the Turks from the rear capturing the position.[47]

The next day the Auckland and Canterbury Mounted Rifles, the
Holding out until they were relived on 9 August, the brigade, which was understrength to start with, had virtually ceased to exist as a fighting unit. The Auckland Mounted Rifles only had sixty-six men from a strength of 310 all ranks that had started the battle.[45] The Canterbury Mounted Rifles lost 105 men around forty percent of their strength.[49] The Wellington Mounted Rifles, had sixty-seven men left from 173 all ranks.[50]
Hill 60
Two weeks later the Canterbury and Otago Mounted Rifles were selected to take part in the next battle to capture Hill 60. At 15:30 21 August the battle began, the Canterbury Mounted Rifles charging straight at the hill suffered sixty percent casualties, among them their commanding officer. They did however succeed in capturing the Turkish trench, within fifteen minutes of

On 27 August a second attempt to capture Hill 60 began. At 17:00 the Auckland and Canterbury Mounted Rifles captured the Turkish front line. The Wellington and Otago Mounted Rifles following up, passed beyond them and captured the Turkish reserve line. On the other flanks the supporting assaults had failed, leaving the Wellington and Otago Mounted Rifles isolated on a narrow front. So the brigade consolidated the ground already captured and moved forward their machine-guns, to support the defence, the forward line of which only consisted of forty men. However, all four regiments suffered heavy casualties and had to fight off several counter-attacks. Until 29 August when they were relieved and moved to the rear.[54][55]
Evacuation
In September the brigade, now only twenty officers and 229 other ranks, was relieved by the Australians and left the peninsula for the rest camp on the island of Lemnos, arriving at Moudros on 14 September.[56] While recuperating the survivors were joined by, thirty officers and 1,060 other ranks, replacements for their casualties.[57]
On 10 November the brigade returned to Gallipoli,[58] Moving back into the front line, they were not involved in any more assaults. Then on 12 December orders for the evacuation were issued. The first men to leave were anyone with the slightest illness. Then one regiment or battalion from each brigade, the Auckland Mounted Rifles, were chosen, from the brigade.[59] This meant that the remainder had to extend their lines covering for them. The last men were due to leave over the night of 19/20 December.[60] Each regiment was divided into three groups, the first group leaving at the 17:30 19 December, followed by the second smaller group at 21:35. The last group of men having to cover for the whole brigade kept up a steady rate of fire and moved their machine-guns around the position to support the deception that all defences were fully manned. The last group was also divided into three, the first of which left at 01:45 20 December. Followed by the next group who waited ten minutes then followed them and the last small group of men left at 02:05. Once on the evacuation beach, they boarded their transport ships they sailed back to Lemnos. Then on 22 December returned to Egypt, arriving at Alexandria on 26 December, and eventually arrived back at their old camp at Zeitoun.[61] During the campaign 4,000 men served with the brigade and almost fifty percent of them, 727 dead and 1,239 wounded, became casualties.[9]
Sinai
In January 1916, the brigade left Zeitoun and headed east camping that night beside the

Katia
Without any notice at 20:30 23 April, the brigade was ordered to
Romani
This section needs expansion. You can help by adding to it. (December 2013) |

Abd

This section needs expansion. You can help by adding to it. (December 2013) |
Magdhaba
This section needs expansion. You can help by adding to it. (December 2013) |
Palestine
Rafa
This section needs expansion. You can help by adding to it. (December 2013) |
Gaza
This section needs expansion. You can help by adding to it. (December 2013) |
Beersheba
This section needs expansion. You can help by adding to it. (December 2013) |
Ayun Kara
River Auja

This section needs expansion. You can help by adding to it. (December 2013) |
Jordan Valley

This section needs expansion. You can help by adding to it. (December 2013) |
Jericho
Amman
Es Salt
Chaytor's Force

Post war
This section needs expansion. You can help by adding to it. (December 2013) |
The New Zealand Mounted Rifles were the probable main participants in the
References
- Footnotes
- Ottoman Turkish Empire. While the terms have distinct historical meanings, within many English-language sources the term "Turkey" and "Ottoman Empire" are used synonymously, although many academic sources differ in their approaches.[2]The sources used in this article predominately use the term "Turkey".
- ^ Wilkie has the brigade strength at ninety-eight officers, 1,842 other ranks.[8]
- Citations
- ^ a b c Kinloch 2005, p.32
- ^ Fewster, Basarin, Basarin 2003, pp.xi–xii
- ^ Kinloch 2005, p.29
- ^ a b Kinloch 2005, p.31
- ^ "Auckland Mounted Rifles Regiment". New Zealand History. Retrieved 5 November 2013.
- ^ Waite 1919, p.6
- ^ a b Kinloch 2005, p.30
- ^ Wilkie 1924, p.19
- ^ a b c Kinloch 2005, p.15
- ^ Powles 1928, p.106
- ^ a b Luxford 1923, pp.178–179
- ^ Kinloch 2005 pp. 242–3
- ^ Kinloch 2005 p. 243
- ^ Nicol 1921, p.12
- ^ Nicol 1921, p.20
- ^ Nicol 1921, p.21
- ^ Waite 1919, p.40
- ^ Waite 1919, pp.42–43
- ^ Powles 1928, p.15
- ^ Powles 1928, p.17
- ^ Powles 1928, p.27
- ^ Powles 1928, p.28
- ^ Wilkie 1924, p.15
- ^ Waite 1919, p.135
- ^ Wilkie 1924, p.17
- ^ Waite 1919, p.136
- ^ Powles 1928, p.29
- ^ a b Waite 1919, p.138
- ^ Nicol 1921, pp.44–45
- ^ Waite 1919, pp.141–142
- ^ Waite 1919, p.142
- ^ a b Powles 1928, p.32
- ^ Powles 1928, p.36
- ^ Powles 1928, pp.36–37
- ^ a b Nicol 1924, p.27
- ^ a b Powles 1928, p.37
- ^ Waite 1924, p.28
- ^ Waite 1924, pp.28–29
- ^ a b Waite 1924, p.29
- ^ Powles 1928, pp.37–38
- ^ Waite 1924, pp.31–32
- ^ Waite 1924, pp.32–33
- ^ Powles 1928, p.40
- ^ Powles 1928, p.45
- ^ a b Nicol 1921, p.75
- ^ Powles 1928, pp.46–48
- ^ Wilkie 1924, pp.45–46
- ^ Wilkie 1924, pp.51–55
- ^ Powles 1928, p.54
- ^ Waite 1924, p.57
- ^ Powles 1928, pp.56–57
- ^ Waite 1919, p.252
- ^ Powles 1928, p.59
- ^ Nicol 1921, pp.81–84
- ^ Wilkie 1924, pp.63–64
- ^ Waite 1919, p.261
- ^ Waite 1919, p.266
- ^ Wilkie 1924, p.68
- ^ Waite 1919, p.280
- ^ Powles 1928, pp.71–72
- ^ Powles 1928, pp.72–75
- ^ Briscoe Moore 1920, pp.18–19
- ^ Gullett, p.57
- ^ Powles 1928, pp.90–91
- ^ Powles 1928, pp.92–93
- ^ Powles 1928, p.95
- ^ Powles 1928, p.103
- Bibliography
- Briscoe Moore, A (1920). The Mounted Riflemen in Sinai And Palestine the Story of New Zealand's Crusaders. Auckland: Whitcombe and Tombs. ISBN 1847343457.
- Fewster, Kevin; Basarin, Vecihi; Basarin, Hatice Hurmuz (2003). Gallipoli: The Turkish Story. Crows Nest, New South Wales: Allen and Unwin. ISBN 1-74114-045-5.
- OCLC 59863829.
- Kinoch, Terry (2005). Echoes of Gallipoli: In the Words of New Zealand's Mounted Riflemen. Wollombi: Exisle Publishing. ISBN 0908988605.
- Luxford, J H (1923). With the Machine Gunners in France and Palestine. Auckland: Whitcombe and Tombs. ISBN 1843426773.
- Nicol, C.G. (1921). The Story of Two Campaigns: Official War History of the Auckland Mounted Rifles Regiment, 1914–1919. Auckland: Wilson and Horton. ISBN 1847343414.
- Powles, C. Guy; A. Wilkie (1922). The New Zealanders in Sinai and Palestine. Official History New Zealand's Effort in the Great War. Vol. III. Auckland: Whitcombe & Tombs. OCLC 2959465.
- Powles, Charles Guy (1928). The History of the Canterbury Mounted Rifles 1914–1919. Auckland: Whitcombe and Tombs. ISBN 9781847343932.
- Stack, Wayne (2011). The New Zealand Expeditionary Force in World War I. Men-at-arms series. Vol. 473. Oxford: Osprey Publishing. ISBN 1849088888.
- Waite, Fred (1919). The New Zealanders at Gallipoli. Christchurch: Whitcombe and Tombs. ISBN 1407795910.
- Wilkie, A. H. (1924). Official War History of the Wellington Mounted Rifles Regiment, 1914–1919. Auckland: Whitcombe and Tombs. ISBN 9781843427964.
Further reading
- Mackay, Don (2012). The Troopers Tale The History of the Otago Mounted Rifles. Dunedin: Turnbull Ross. ISBN 978-0-473-20462-4.
