
Zeebrugge Raid
| Zeebrugge Raid | |||||||
|---|---|---|---|---|---|---|---|
| Part of the First World War | |||||||
.png) Diagram of Zeebrugge harbour after the raid | |||||||
| |||||||
| Belligerents | |||||||
|
|
| ||||||
| Commanders and leaders | |||||||
|
|
| ||||||
| Strength | |||||||
|
1,700 Royal Marines 1 destroyer | |||||||
| Casualties and losses | |||||||
|
227 killed 356 wounded 1 destroyer sunk |
8 killed 16 wounded | ||||||
The Zeebrugge Raid (
An attempt to raid Zeebrugge was made on 2 April 1918 but was cancelled at the last moment, after the wind direction changed and made it impossible to lay a
Background
Strategic developments
At the end of 1916 a combined operation against
Rear-Admiral
Tactical developments

The possibility of a landing on the Belgian coast was not abandoned, despite the number of rejected plans and early in 1917, Bacon assisted in the planning of
The bombardment would have to be undertaken at long range, because of the danger of return fire from the Kaiser Wilhelm battery at Knokke and meant aiming at a target 90 by 30 sq ft (8.4 by 2.8 m2) in area at a range of 13 nmi (15 mi; 24 km), using directions from an artillery-observation aircraft. Bacon calculated that 252 shells would be necessary and that it would take at least 84 minutes to fire them. If the attempt began with surprise and the bombardment ships were obscured by a smoke screen, the German guns at Knokke might not have enough time accurately to return fire before the bombardment ended. Bacon thought that the destruction of the lock gates was worth the sacrifice of a monitor but that risking all three for no result was impossible to avoid.[4]
The plan needed a rare combination of wind, tide and weather; to obtain surprise the monitors would need to be in position before dawn. Mist and low cloud would make artillery observation from an aircraft impossible and the wind would have to be blowing from a narrow range of bearings or the smoke screen would be carried over the ships and out to sea, exposing them to view from the shore. Such conditions were unlikely to recur for several days, making a bombardment on the following day most unlikely. The bombardment force sailed for Zeebrugge three times but changes in the weather forced a return to England each time.[5][a] On 11 May, Bacon ordered another attempt for the next day; a buoy was laid 15 nmi (17 mi; 28 km) to the north-west of the mole as a guide and a second buoy was placed in the bombardment position. A bearing was taken from the buoy to the base of the mole at Zeebrugge by a ship sailing from the buoy to the mole, despite a mist which reduced visibility to a mile and the ship advancing perilously close to German shore batteries. The ship returned to the buoy by 4:45 a.m., with the bearing and distance. The bombardment ships had taken position, the Motor Launches had formed a line, ready to generate the smokescreen and the escorts formed a square around the monitors. Five destroyers zigzagged around the flotilla as a screen against U-boats, the minesweepers began operating around the monitors and the covering force cruised in the distance, ready to intercept a German destroyer sortie.[6]
Zeebrugge bombardment, 12 May 1917
The bombardment opened late because of the need to tow Marshal Soult, slowing the armada and also by a haze off the harbour. Two Royal Naval Air Service (RNAS) artillery-observation aircraft from Dunkirk, which had taken off at 2:00 a.m., had to wait from 3:00 a.m. over Zeebrugge for almost two hours. The aircraft were met by seven Sopwith Pups from 4 (Naval) Squadron RNAS, which patrolled the coast from 5:45 a.m. as six Sopwith Triplanes of 10 (Naval) Squadron RNAS flew over the fleet. One of the artillery-observation aircraft had engine trouble and force-landed in the Netherlands; the other ran short of petrol. Firing from the monitors was opened just after 5:00 a.m. and at first fell short; many of the shells failed to explode, which left the aircraft unable to signal the fall of shot. The accuracy of the bombardment improved soon after; Marshal Soult hit the target with its twelfth shell and Erebus with its twenty-sixth. Terror was most hampered by the loss of one of the aircraft and by dud shells; only forty-five of the 250 shells fired were reported and the observation aircraft had to return because of fuel shortage at 5:30 a.m., leaving the last half-hour of the bombardment reliant on estimated corrections of aim.[7] Two relieving aircraft also had engine trouble and failed to arrive.[8]
In the first hour of the bombardment, German retaliation was limited to anti-aircraft fire and attempts to jam the wireless of the artillery-observation aircraft. When the Pups from 4 (Naval) Squadron arrived, twice their number of German Albatros fighters engaged them and some of the aircraft from over the fleet, which joined in the dogfight. The British claimed five German aircraft shot down and the fleet was able to complete the bombardment. A third patrol later shot down a German seaplane into Ostend harbour and lost one fighter.[8] At 6:00 a.m. the ships weighed anchor, just as the Kaiser Wilhelm battery opened fire. Two seaplanes which attempted to approach the fleet were driven off by British fighter seaplanes, which escorted the fleet home.[8] Bacon returned with the impression that the bombardment had succeeded but aerial photographs taken the following week revealed that about fifteen shells had landed within a few yards of the lock gates on the western side and four shells had fallen just as close on the eastern side. The basin north of the locks had been hit and some damage caused to the docks but Zeebrugge remained open to German destroyers and U-boats.[9] The Admiralty concluded that had the monitors been ready to fire as soon as the observer in the artillery-observation aircraft signalled or if the shoot had been reported throughout, the lock gates would have been hit. Bacon made preparations to bombard Ostend harbour.[8]
Ostend bombardment, 5 June 1917

Attempts to bombard Ostend on 26 and 27 May were abandoned because of poor weather but on 4 June, the bombardment ships sailed for the Ratel Bank off Ostend; the bombardment force was smaller and the covering force larger than for the Zeebrugge operation, since surprise was less likely.[10][b] The Harwich Force provided four light cruisers, a flotilla leader and eight destroyers as a covering force off the Thornton Bank and a second wave of four light cruisers and eight destroyers to guard against an attack from the Schouwen Bank. The firing buoy and its bearing and range from the target were established using the Zeebrugge method and the escorting ships formed a square around the bombardment ships.[10]
.jpg)
German destroyers were sighted east of the Ratel Bank at 1:42 a.m. by HMS Lance and Lochinvar which were steering towards Ostend to establish the range and bearing of the target from the sighting buoy. The German destroyers frustrated two attempts to enter the harbour, which left the fleet without sighting data and reliant on dead reckoning. At about 2:30 a.m., gunfire was heard from the direction of the covering force to the north and at about 3:00 a.m. the bombardment force Motor Launches began to lay a smokescreen. At dawn the coast became visible and Bacon corrected the position by taking a bearing on Sint-Petrus-en-Pauluskerk. The bombardment commenced at 3:20 a.m., German coastal guns replied within minutes and fired accurately at Erebus and Terror but with no effect.[12]
The British bombardment ceased at 4:00 a.m.; the fleet weighed anchor at 4:20 a.m. and withdrew northwards. The covering force guarded the ships from a point 5 nmi (5.8 mi; 9.3 km) distant, having engaged two German destroyers as they tried to reach Zeebrugge, sinking
Prelude
German defences
By 1917 the German defences on the Flanders coast included Kaiser Wilhelm II, a heavy artillery battery at Knokke, east of the Bruges Canal, of four 12 in (300 mm) guns, with a range of 41,000 yd (23 mi; 37 km) and the Tirpitz battery of four 11 in (280 mm) guns, with a range of 35,000 yd (20 mi; 32 km), 1.5 mi (2.4 km) west of Ostend. Two more batteries were being built in early 1917 and between the main defences were many mobile guns, entrenchments and machine-gun nests. The only vulnerable part of the German defensive system was the lock gates at Zeebrugge, the destruction of which would make the canal to Bruges tidal and drastically reduce the number of ships and submarines that could pass along it.[15]
British preparations
An appeal was made to the
Raid

A second attempt was made on 23 April, in conjunction with a raid on the neighbouring harbour of
The attempt to sink three old cruisers to block the flow of traffic in and out of the
Aftermath
Analysis
Zeebrugge

In 1931, the official historian, Sir Henry Newbolt, wrote that before the raid, two submarines entered or left the Flanders bases each day and continued at that rate during the week after the raid. The block ships were sunk in the wrong position and the canal was only obstructed for a few days. The Germans removed two piers in the western bank of the canal near the block ships and dredged a channel through the silt near their sterns. At high tide, U-boats could move along the new channel past the block ships.[30]
The average number of passages was maintained until June, when the rate fell to about one submarine per day, to an extent due to a bombardment of Zeebrugge on 9 June. After the damage was repaired, the rate of U-boat traffic did not return to the pre-raid level.[31] Newbolt considered that the reduced traffic was caused by the recall of some U-boats to Germany in June, after reports that operations in the Dover Straits had become too dangerous. The usual remedy, of increasing the number of destroyer raids, was not possible because of the difficulty in using Zeebrugge as a harbour.[31]
Newbolt wrote that the raid on Zeebrugge was part of an anti-submarine campaign which had lasted for five months, using patrols and minefields to close the Straits and which continued despite the most destructive sortie achieved by the Germans during the war. The British anti-submarine measures inflicted a steady attrition of the Flanders U-boats and the attack on Zeebrugge came when the German blockade of Britain was supposed to have reduced drastically the resources and endurance of the British Empire.[32] News of the raid was skilfully exploited to raise Allied morale and to foreshadow victory Possunt quia posse videntur ("They can because they think they can").[32] Bacon wrote in 1931 that he was a seagoing commander with intimate knowledge of the tidal and navigational conditions in the Ostend and Zeebrugge areas; operational failures were due in part to the appointment of Keyes (an Admiralty man) and his changes to plans Bacon had laid.[33]
Ostend
Ostend had been attacked at the same time as the attempt on Zeebrugge but this effort was a failure. Believing the Zeebrugge raid to have been effective, the British undertook the Second Ostend Raid on 9 May, in which Vindictive and another cruiser HMS Sappho were sunk as a blockships. The plan took guidance from the experience gained at Zeebrugge.[34]
Casualties
Of the 1,700 men involved in the operation, S. F. Wise recorded in 1981 that 300 were wounded and more than 200 killed.
Victoria Cross
The Zeebrugge Raid was promoted by Allied propaganda as a British victory and eight Victoria Crosses were awarded. The 4th Battalion Royal Marines was awarded the Victoria Cross for the action. Under Rule 13 of the Victoria Cross warrant, a ballot was stipulated to select the recipients. Victoria Cross rules specify that four Victoria Crosses should be awarded this way (one to an officer, one to an NCO and two to other ranks) but they were not observed and only two Victoria Crosses were awarded. This was the last time that Victoria Crosses were awarded by ballot, although the rule remained within the Victoria Cross warrant. In a mark of respect to those involved in the raid, the Royal Marines have never raised another 4th Battalion.[44]
A ballot was similarly held for the crews of the assault vessels for the Zeebrugge Mole (Vindictive, Royal Daffodil and Iris II) and the raiding parties. Victoria Crosses were awarded to Able Seaman
-
![SS Brussels, torpedoed several times during the raid by the British and scuttled by the Germans in October 1918[45]](//upload.wikimedia.org/wikipedia/commons/thumb/e/ec/SS_Brussels_Zeebrugge_Raid.jpg/339px-SS_Brussels_Zeebrugge_Raid.jpg) SS Brussels, torpedoed several times during the raid by the British and scuttled by the Germans in October 1918[45]
SS Brussels, torpedoed several times during the raid by the British and scuttled by the Germans in October 1918[45] -
 Dedication text of Zeebrugge Cross of Sacrifice in Dover
 -
 Zeebrugge Memorial and graves from St James Cemetery in Dover
 -
 Saint George's Day memorial in Zeebrugge
 -
 Commemorative plate in the port of Zeebrugge
 -
 Detail of the commemorative plate in the port of Zeebrugge
 -
 William Lionel Wyllie - The Storming of Zeebrugge Mole, St George's Day
 -
 Charles John De Lacy - HMS Vindictive at Zeebrugge, 23 April 1918
 -
 Monument in London to Albert Mckenzie for his role in the raid
 -
 Memorial plaque for the missing in Zeebrugge Churchyard
 -
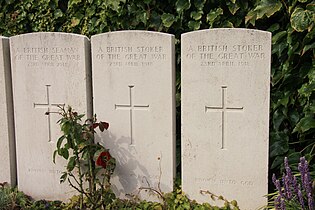 Graves of unidentified British casualties buried in Zeebrugge Churchyard
![SS Brussels, torpedoed several times during the raid by the British and scuttled by the Germans in October 1918[45]](/File:SS_Brussels_Zeebrugge_Raid.jpg)


Order of battle
Royal Navy order of battle for the Zeebrugge and Ostend Raids: 22 April 1918[46]
- Assembled at the Swin Spitway (off the River Blackwater, Essex)
- Assault vessels for the Zeebrugge Mole: Mersey ferries)
- Blockships for the Bruges Canal: HMS Thetis, HMS Intrepid and HMS Iphigenia (Apollo-class cruisers)
- Blockships for Ostend Harbour: HMS Sirius and HMS Brilliant (Apollo-class cruisers)
- Assault vessels for the Zeebrugge Mole:
- Assembled at Dover
- Flagship, HMS Warwick (Admiralty W-class destroyer)
- Unit L (to escort Vindictive): HMS Phoebe and HMS North Star (Admiralty M-class destroyers)
- Unit M (to tow submarines): HMS Trident (Talisman-class destroyer) and HMS Mansfield (Hawthorn M-class destroyer)
- Unit F (to patrol north of Zeebrugge): HMS Whirlwind (Admiralty W-class destroyer) and HMS Myngs (Admiralty M-class destroyer)
- Unit R (to patrol north of Zeebrugge): HMS Velox (Admiralty V-class destroyer), HMS Morris, HMS Moorsom (Admiralty M-class destroyers) and HMS Melpomene (Medea-class destroyer)
- Unit X (escort to Ostend blockships): HMS Tempest and HMS Tetrarch (R-class destroyer)
- Submarines (to damage Zeebrugge viaduct): HMS C1 and HMS C3 (British C-class submarines), together with a picket boat to rescue crews
- Minesweeper (to take off surplus crew from blockships): HMS Lingfield (Racecourse-class minesweeper)
- Coastal motor boats (CMB), numbers 5, 7, 15, 16, 17, 21B, 22B, 23B, 24A, 25BD, 26B, 27A, 28A, 29A, 30B, 32A, 34A and 35A
- Motor Launches (ML), numbers 79, 110, 121, 128, 223, 239, 241, 252, 258, 262, 272, 280, 282, 308, 314, 345, 397, 416, 420, 422, 424, 513, 525, 526, 533, 549, 552, 555, 557, 558, 560, 561 and 562
- To bombard Zeebrugge: HMS Erebus and HMS Terror (Erebus-class monitors)
- Escort to Zeebrugge monitors: HMS Termagant (Talisman-class destroyer), HMS Truculent (Yarrow Later M-class destroyer) and HMS Manly (Yarrow M-class destroyer)
- Outer Patrol off Zeebrugge: HMS Attentive (Adventure-class cruiser), HMS Scott (Admiralty type flotilla leader), HMS Ulleswater (Yarrow Later M-class destroyer), HMS Teazer and HMS Stork (R-class destroyers)
- Assembled at Dunkirk
- Monitors (to bombard Ostend): HMS Marshal Soult (Marshal Ney-class monitor), HMS Lord Clive, HMS Prince Eugene, HMS General Craufurd (Lord Clive-class monitors), HMS M24, HMS M26 and HMS M21 (M15-class monitors)
- Outer Patrol off Ostend: HMS Swift (destroyer leader), HMS Faulknor (Faulknor-class flotilla leader), HMS Matchless, HMS Mastiff (Thornycroft M-class destroyers) and HMS Afridi (1905 Tribal-class destroyer)
- Escort to Ostend monitors: HMS Mentor (Hawthorn M-class destroyer), HMS Lightfoot (Marksman-class flotilla leader), HMS Zubian (Tribal-class destroyer) and French Navy destroyers Lestin, Roux and Bouclier
- Motor Launches (12 for smoke screens and 6 for escort to large monitors), Numbers 11, 16, 17, 22, 23, 30, 60, 105, 254, 274, 276, 279, 283, 429, 512, 532, 551, 556
- French Navy torpedo boats (TB) and motor launches (escort to M-class monitors), TB numbers 1 and 2, ML numbers 33 and 3
- Coastal Motor Boats(CMB): numbers 2, 4, 10 and 12 (40 ft class) and numbers 19A and 20A (55 ft class)
- Personnel participating in raids and covering operations
- Royal Navy: 82 officers and 1,698 men including
- Royal Marine Artillery: 2 officers and 58 men and
- Royal Marine Light Infantry: 30 officers and 660 men
- Royal Navy: 82 officers and 1,698 men including
See also
- St Nazaire Raid – a similar operation of the Second World War
Notes
- ^ Three 15-inch monitors, a 12-inch monitor, "M" monitors 24 and 26, two destroyer flotilla leaders, Botha and Faulknor, eight destroyers from the 6th Flotilla, Lochinvar, Landrail, Lydiard, Mentor, Moorsom, Morris, Mermaid and Racehorse, six paddle minesweepers and 19, motor-launches. Tyrwhitt, with two cruisers and twelve destroyers of the Harwich Force, covered the operation.[5]
- ^ Erebus and Terror, two flotilla leaders, six destroyers, two P-boats and twelve Motor Launches.[11]
- ^ Leading Stoker Norbert McCrory recalled that "On 23rd Feb 1918.... We... received a wireless [communication] asking for volunteers to the numbers of eleven men, for special service. On receiving the message, Seamen and Stokers were asked to volunteer. Soon it was seen all who wished to go could not be accepted, much to their disappointment. Only eleven were chosen".[16] Lieutenant Commander Ronald Boddie recalled, "It was the 1st March when I joined the Hindustan [at Chatham] with 40 other officers, 200 seamen and 250 stokers, all from the Grand Fleet. The Hindustan was an elderly battleship and was to be our home until the expedition was ready to sail".[17]
- ^ Able Seaman William O'Hara recalled the moment when he reported at Chatham Barracks, "There was great speculations as to what we were there for but no one could satisfy our curiosity. We were eventually detailed off into four sections, men belonging to ships of the same squadron being detailed to the same section".[20]
- ^ Submarine C3: Lieutenant Richard Sandford, R.N. wounded, Lieutenant J. Howell Price, D.S.C., R.N.R., Coxswain, Petty-Officer W. Harner, O.N. 228795 wounded, E.R.A. A. G. Roxburgh, O.N. 272242, Leading Seaman W.G. Mayer, On.N. 22196, Stoker 1., H. C. Bindall, O.N. K5343 wounded. Submarine C1: Lieutenant A.C. Newbold, R.N., Lieutenant S.A. Bayford, D.S.C., R.N.R., Petty-Officer H. G. Jones, L.T.O., O.N. 17 994, Petty Officer G. T. Newman, O.N. 213236 Coxswain, E.R.A. W. H. R. Coward, O.N. 1495, Stoker Petty-Officer F. J. Smith, O.N. 299134.[28]
- A. M. Low said "...the preparation of bombs, which although successful, only just operated in time for Commander Brock to see them in the last hours of his life at Zeebrugge".[38]
- ^ Archibald Low, The First Guided Missile "....rocket experiments were conducted under my own patents with the help of Cdr. Brock, a truly great man who lost his life at Zeebrugge. For that Mole attack I had prepared a radio-fired bomb device by which any one of a number of floating buoys could be selected and exploded by radio."[39]
- ^ IWM - Royal Flying Corps Feltham Transmitter for the selective firing of floating mines for use in the Zeebrugge raid.[40]
- ^ Kendall lists the names of the fatalities and the locations of their graves, which are predominantly in the United Kingdom.[42]
Footnotes
- ^ Newbolt 2009, pp. 241–242.
- ^ Newbolt 2009, pp. 241–243.
- ^ Newbolt 2009, p. 36.
- ^ a b Newbolt 2009, pp. 37–38.
- ^ a b Newbolt 2009, p. 38.
- ^ Newbolt 2009, pp. 39–40.
- ^ Newbolt 2009, p. 40.
- ^ a b c d Jones 2002, p. 84.
- ^ Newbolt 2009, p. 41.
- ^ a b Newbolt 2009, p. 46.
- ^ Newbolt 2009, p. 45.
- ^ a b Newbolt 2009, pp. 46–47.
- ^ Newbolt 2009, pp. 47–48.
- ^ Newbolt 2009, pp. 118–119.
- ^ Newbolt 2009, pp. 36–37.
- ^ Kendall 2016, p. 11.
- ^ Kendall 2016, p. 29.
- ^ Newbolt 2009, pp. 244–249.
- ^ Kendall 2016, pp. 11, 29, 31.
- ^ Kendall 2016, p. 30.
- ^ Newbolt 2009, pp. 251–252.
- ^ Coleman 2014, p. 180.
- ^ Newbolt 2009, pp. 252–261.
- ^ Warner 2008, Part One, c. 3, para. 2.
- ^ Newbolt 2009, pp. 261–262.
- ^ Newbolt 2009, p. 245.
- ^ Newbolt 2009, p. 260.
- ^ The Times 1919, p. 342.
- ^ Coleman 2014, pp. 151–152.
- ^ Newbolt 2009, p. 265.
- ^ a b Newbolt 2009, p. 276.
- ^ a b Newbolt 2009, pp. 276–277.
- ^ Bacon 1932, pp. 161–166, 223–227.
- ^ Coleman 2014, pp. 130–136, 209–225.
- ^ Wise 1981, p. 205.
- ^ Kendall 2009, p. 11.
- ^ Coleman 2014, p. 239.
- ^ a b Bloom 1958, p. 82.
- ^ Low 1952, p. 436.
- ^ "Transmitter, for remote radio control mines". Archived from the original on 19 July 2021. Retrieved 19 July 2021.
- ^ CWGC 2010.
- ^ a b Kendall 2009, pp. 308–310.
- ^ Karau 2003, p. 210.
- ^ a b Coleman 2014, pp. 230–233.
- ^ Kendall 2009, p. 256.
- ^ Keyes 2013.
References
Books
- Bacon, Admiral Sir R. (1932). The Concise Story of the Dover Patrol. London: Hutchinson. OCLC 1899634. Retrieved 3 July 2013 – via Archive Foundation.
- Bloom, Ursula (1958). He Lit The Lamp: A Biography Of Professor OCLC 1998665.
- Coleman, E. C. (2014). No Pyrrhic Victories: The 1918 Raids on Zeebrugge and Ostend. A Radical Reappraisal. Stroud: The History Press. ISBN 978-0-7509-5849-3.
- Jones, H. A. (2002) [1934]. The War in the Air: Being the Part played in the Great War by the Royal Air Force. Vol. IV (Imperial War Museum and Naval & Military Press repr. ed.). London: Clarendon Press. ISBN 978-1-84342-415-4. Retrieved 4 September 2016 – via Archive Foundation.
- Karau, M. D. (2003). Wielding the Dagger: The Marinekorps Flandern and the German War Effort, 1914–1918. Westport, CT: Praeger. ISBN 978-0-313-32475-8.
- Kendall, P. (2009). The Zeebrugge Raid 1918: The Finest Feat of Arms. Brimscombe Port: Spellmount. ISBN 978-1-86227-477-8.
- Kendall, P. (2016). The Zeebrugge Raid 1918 (Voices from the Past). Barnsley, South Yorkshire: Frontline Books. ISBN 978-147387-671-2.
- Newbolt, H. (2009) [1931]. Naval Operations. History of the Great War Based on Official Documents by Direction of the Historical Section of the Committee of Imperial Defence. Vol. V (Imperial War Museum and Naval & Military Press ed.). London: Longmans. ISBN 978-1-84342-493-2.
- The Times History of the War. Vol. XVIII (online scan ed.). London: The Times. 1914–1921. OCLC 70406275. Retrieved 28 December 2013.
- Warner, Philip (2008) [1978]. The Zeebrugge Raid. Barnsley, South Yorkshire: Pen & Sword Books Ltd. ISBN 978-1-84415-677-1.
- Wise, S. F. (1981) [1980]. Canadian Airmen and the First World War. The Official History of the Royal Canadian Air Force. Vol. I (repr. ed.). Toronto: ISBN 978-0-8020-2379-7.
Magazines
- ISSN 0015-3710.
Websites
- "CWGC: Cemetery Details for Dover (St James's) Cemetery". Commonwealth War Graves Commission. Archived from the original on 2 February 2018. Retrieved 5 August 2016.
- Keyes, Roger (1 March 2013). "31189: 18 February 1919, Zeebrugge and Ostend Raids, Naval Despatch dated 9 May 1918". www.naval-history.net. Gordon Smith. Archived from the original on 7 August 2016. Retrieved 21 August 2016.
Further reading
- OCLC 1866877. Retrieved 3 July 2013.
- Jacobs, Kristof (2018) [2007]. Nieuwpoort Sector 1917: The Battle of the Dunes (Eng. pbk. trans. Unicorn, London ed.). Erpe: Uitgeverij De Krijger. ISBN 978-1-910500-88-0.
- Lake, D. (2015) [2002]. The Zeebrugge and Ostend Raids 1918. Barnsley: Pen & Sword Books. ISBN 978-1-47-383796-6.
- McGreal, Stephen (2008). Zeebrugge and Ostend Raids. Barnsley: Pen and Sword. ISBN 978-1-84415-608-5.
- Pitt, B. (2003) [1958]. Zeebrugge: Eleven VCs before Breakfast (Phoenix ed.). London: Cassell. ISBN 978-0-304-36340-7.
- Pitt, Barrie (1958). Zeebrugge: St. George's Day, 1918. London: Cassell. OCLC 2414535.
- Prince, S. (2010). The Blocking of Zeebrugge – Operation Z-O 1918. Oxford: Osprey. ISBN 978-1-84603-453-4.
- Terry, C. S. (1919). Ostend and Zeebrugge 23 April – 19 May 1918: the Dispatches of Vice-Admiral Sir Roger Keyes and Other Narratives of the Operations. London: OUP. OCLC 543493. Retrieved 18 October 2013.
External links
- British Pathe footage of the Zeebrugge Raid in 1918
- British Pathe film of the mass burial of British casualties of the Zeebrugge Raid, 1918, held in St James's Cemetery and the burial (24 coffins, nine identified, 15 unidentified) had a "Cross of Sacrifice" above it.
- 2013 Photo of the Zeebrugge Bell and Housing on Dover Town Hall
- HMS Vindictive storms the Zeebrugge mole: painting by Charles de Lacy at the Britannia Royal Naval College
- Battles: The Raid on Zeebrugge, 1918 FirstWorldWar.net
- 23 April 1918 – Zeebrugge Raid Western Front Association
- Items of the IWM Collection associated with the Zeebrugge Raid