Military history of New Zealand during World War II
This article needs additional citations for verification. (November 2013) |
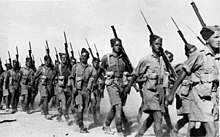
The military history of New Zealand during World War II began when
New Zealand's forces were soon serving across Europe and beyond, where their reputation was generally very good. In particular, the force of the New Zealanders who were stationed in Northern Africa and Southern Europe was known for its strength and determination, and uniquely so on both sides.
New Zealand provided personnel for service in the
The
Background
Diplomatically, New Zealand[who?] had expressed vocal opposition to fascism in Europe and also to the appeasement of fascist dictatorships,[2] and national sentiment for a strong show of force met with general support. Economic and defensive considerations also motivated New Zealand involvement—reliance on Britain meant that threats to Britain became threats to New Zealand too in terms of economic and defensive ties.[citation needed]
There was also a strong sentimental link between the former British colony and the United Kingdom, with many seeing Britain as the "mother country" or "Home". This was reinforced by New Zealand's status as a "
It is with gratitude in the past, and with confidence in the future, that we range ourselves without fear beside Britain, where she goes, we go! Where she stands, we stand![5]
Declaration of war on Nazi Germany
The state of war with Germany was officially held to have existed since 9:30 pm on 3 September 1939 (local time), simultaneous with that of Britain, but in fact New Zealand's declaration of war was not made until confirmation had been received from Britain that their ultimatum to Germany had expired. When Neville Chamberlain broadcast Britain's declaration of war, a group of New Zealand politicians (led by Peter Fraser because Prime Minister Michael Savage was terminally ill) listened to it on the shortwave radio in Carl Berendsen's room in the Parliament Buildings. Because of static on the radio, they were not certain what Chamberlain had said until a coded telegraph message was received later from London. This message did not arrive until just before midnight because the messenger boy with the telegram in London took shelter due to a (false) air raid warning. The Cabinet acted after hearing the Admiralty's notification to the fleet that war had broken out. The next day the Cabinet approved nearly 30 war regulations as laid down in the War Book, and after completing the formalities with the Executive Council the Governor-General, Lord Galway, issued the Proclamation of War, backdated to 9.30 pm on 3 September.[6][7]
Home front
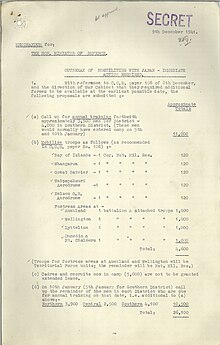
In total, around 140,000 New Zealand personnel served overseas for the Allied war effort, and an additional 100,000 men were armed for Home Guard duty. At its peak in July 1942, New Zealand had 154,549 men and women under arms (excluding the Home Guard) and by the war's end, a total of 194,000 men and 10,000 women had served in the armed forces at home and overseas.
Auxiliary services were raised for women: the Women's Auxiliary Army Corps was the largest, followed by the Women's Auxiliary Air Force, and then the Women's Royal New Zealand Naval Service.[citation needed]
Conscription was introduced in June 1940, and volunteering for Army service ceased from 22 July 1940, although entry to the Air Force and Navy remained voluntary. Difficulties in filling the Second and Third Echelons for overseas service in 1939–1940, the Allied disasters of May 1940 and public demand led to its introduction. Four members of the cabinet including Prime Minister Peter Fraser had been imprisoned for anti-conscription activities in World War I, the Labour Party was traditionally opposed to it, and some members still demanded "conscription of wealth before men". From January 1942, workers could be "manpowered" or directed to essential industries.[8]
Access to imports was hampered and rationing made doing some things very difficult. Fuel and rubber shortages were overcome with novel approaches. In New Zealand, industry switched from civilian needs to making war materials. New Zealand and Australia supplied the bulk of foodstuffs to American forces in the South Pacific, as Reverse
German and Japanese surface raiders and submarines operated in New Zealand waters on several occasions in 1940, 1941, 1942, 1943 and 1945, sinking a total of four ships while Japanese reconnaissance aircraft flew over Auckland and Wellington preparing for a projected Japanese invasion of New Zealand.[citation needed]
During the winter of 1944, the government hastened work on docks and repair facilities at Auckland and Wellington following a British request, to supplement the bases and repair yards in Australia needed for the British Pacific Fleet.[14]
Land forces
Greek campaign
The New Zealand authorities deployed the 2nd New Zealand Expeditionary Force for combat in three echelons – all originally destined for
As German panzers began a swift advance into Greece on 6 April, the British and Commonwealth troops found themselves being outflanked and were forced into retreat. By 9 April, Greece had been forced to surrender and the 40,000 W Force troops began a withdrawal from the country to Crete and Egypt, the last New Zealand troops leaving by 29 April.[citation needed]
During this brief campaign, the New Zealanders lost 261 men killed, 1,856 captured and 387 wounded.[15]
Crete
Two of the three brigades of the New Zealand 2nd Division had evacuated to Crete from Greece (the third and division headquarters went to
Operation Mercury opened on 20 May when the German Luftwaffe delivered Fallschirmjäger around the airfield at Maleme and the Chania area, at around 8:15 pm, by paradrop and gliders. Most of the New Zealand forces were deployed around this north-western part of the island and with British and Greek troops they inflicted heavy casualties upon the initial German attacks. Despite near complete defeat for their landing troops east of the airfield and in the Galatas region, the Germans were able to gain a foothold by mid-morning west of Maleme Airfield (5 Brigade's area) – along the Tavronitis riverbed and in the Ayia Valley to the east (10 Brigade's area – dubbed 'Prison Valley').
Maleme
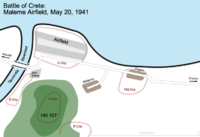
Over the course of the morning, the 600-strong New Zealand 22 Battalion defending Maleme Airfield found its situation rapidly worsening. The battalion had lost telephone contact with the brigade headquarters; the battalion headquarters (in Pirgos) had lost contact with C and D Companies, stationed on the airstrip and along the Tavronitis-side of Hill 107 (see map) respectively and the battalion commander, Lieutenant-Colonel Leslie Andrew (VC) had no idea of the enemy paratrooper strength to his west, as his observation posts lacked wireless sets. While a platoon of C Company situated northwest of the airfield, nearest the sea, was able to repel German attacks along the beach, attacks across the Tavronitis bridge by Fallschirmjäger were able to overwhelm weaker positions and take the Royal Air Force camp. Not knowing whether C and D Companies had been overrun, and with German mortars firing from the riverbed, Colonel Andrew (with unreliable wireless contact) ordered the firing of white and green signals – the designated emergency signal for 23 Battalion (to the south-east of Pirgos), under the command of Colonel Leckie, to counterattack. The signal was not spotted, and further attempts were made to get the message through to no avail. At 5:00 pm, contact was made with Brigadier James Hargest at the New Zealand 2nd Division headquarters, but Hargest responded that 23 Battalion was fighting paratroopers in its own area, an untrue and unverified assertion.
Faced with a seemingly desperate situation, Colonel Andrew played his trump card – two Matilda tanks, which he ordered to counterattack with the reserve infantry platoon and some additional gunners turned infantrymen. The counterattack failed – one tank had to turn back after suffering technical problems (the turret would not traverse properly) and the second ignored the German positions in the RAF camp and the edge of the airfield, heading straight for the riverbed. This lone tank stranded itself quickly on a boulder and faced with the same technical difficulties as the first Matilda, the crew abandoned the vehicle. The exposed infantry were repelled by the Fallschirmjäger. At around 6:00 pm, the failure was reported to Brigadier Hargest and the prospect of a withdrawal was raised. Colonel Andrew was informed that he could withdraw if he wished, with the famous reply "Well, if you must, you must," but that two companies (A Company, 23 Battalion and B Company, 28 (Māori) Battalion) were being sent to reinforce 22 Battalion. To Colonel Andrew, the situation seemed bleak; ammunition was running low, the promised reinforcements seemed not to be forthcoming (one got lost, the other simply did not arrive as quickly as expected) and he still had no idea how C and D companies were. The two companies in question were in fact resisting strongly on the airfield and above the Tavronitis riverbed and had inflicted far greater losses on the Germans than they had suffered. At 9:00 pm, Andrew made the decision to make a limited withdrawal, and once that had been carried out, a full one to the 21 and 23 Battalion positions to the east. By midnight, all of 22 Battalion had left the Maleme area, with the exception of C and D Companies which withdrew in the early morning of the 21st upon discovering that the rest of the battalion had gone.
This allowed German troops to seize the airfield proper without opposition and take nearby positions to reinforce their hold on it.
Galatas
On the night of 23 May and the morning of 24 May, 5 Brigade withdrew again to the area near Daratsos, forming a new front line running from Galatas to the sea. The relatively fresh 18 Battalion replaced the worn troops from Maleme and Platanias, deploying 400 men on a two kilometre front.
Galatas had come under attack on the first day of the battle — Fallschirmjäger and gliders had landed around Chania and Galatas, to suffer extremely heavy casualties.[clarification needed] They retreated to "Prison Valley," where they rallied around Ayia Prison and repulsed a confused counterattack by two companies of 19 Battalion and three light tanks. Pink Hill (so named for the colour of its soil), a crucial point on the Galatas heights, was attacked several times by the Germans that day and was remarkably held by the Division Petrol Company, with the aid of Greek soldiers, though at a heavy cost to both sides. The Petrol Company comprised poorly armed support troops, primarily drivers and technicians, and by the day's end, all their officers and most of their non-commissioned officers had been wounded. They withdrew around dusk. On the second day, the New Zealanders attacked nearby Cemetery Hill to take pressure off their line, and although they had to withdraw, for it was too exposed, the hill became a no man's land as Pink Hill was, relieving the New Zealand front. Day three, 22 May, saw German soldiers take Pink Hill. The Petrol Company and some infantry reserve prepared a counterattack, but a notable incident pre-empted them – as told by Driver A. Pope:
Out of the trees came [Captain] Forrester of the
Buffs, clad in shorts, a long yellow army jersey reaching down almost to the bottom of the shorts, brass polished and gleaming, web belt in place and waving his revolver in his right hand [...] It was a most inspiring sight. Forrester was at the head of a crowd of disorderly Greeks, including women; one Greek had a shotgun with a serrated-edge bread knife tied on like a bayonet, others had ancient weapons—all sorts. Without hesitation, this uncouth group, with Forrester right out in front, went over the top of a parapet and headlong at the crest of the hill. The [Germans] fled.[16]
Days four and five featured only skirmishes between the two forces. Luftwaffe air raids targeted Galatas on 25 May at 8:00 am, 12:45 pm and 1:15 pm, and the German ground attack came at around 2:00 pm. 100 Mountain and 3 Parachute Regiment attacked Galatas and the high ground around it, while two battalions of 85 Mountain Regiment attacked eastwards, with the aim of cutting Chania off. The New Zealand defenders, though prepared, suffered from a disadvantage: 18 Battalion, 400 men, was the only fresh infantry formation on the line – the rest were non-infantry groups like the Petrol Company and the Composite Battalion, consisting of mechanical, supply and artillery troops. The fighting was fierce, especially along the north of the line, and platoons and companies were forced to retreat. Brigadier
By nightfall, German troops had occupied Galatas, and Lieutenant-Colonel Howard Kippenberger prepared a counterattack. Two tanks led two companies of 23 Battalion into Galatas at a running pace – heavy fire was encountered and as the tanks went ahead towards the town square, the infantry cleared each house of German soldiers as they worked inward. When the infantry caught up with the tanks, they found one out of action. With German fire coming primarily from one side of the square, a bayonet charge was mounted and the New Zealanders cleared the German opposition. Patrols quelled resistance elsewhere in Galatas – apart from one small strongpoint, Galatas was back in New Zealand hands.
A conference between Brigadier Inglis and his commanders reached the consensus that Allied forces needed to make a further counterattack urgently – and that without a counterattack Crete would fall to the Germans. Despite hard fighting so far in the battle, the 28 (Māori) Battalion was considered to be the only "fresh" battalion available and the only one capable of carrying out such an attack. Their commander was willing to mount the attack despite the difficulty, but a representative sent from Brigadier Edward Puttick at New Zealand 2nd Division headquarters recommended against such an attack for fear of being unable to hold the line subsequently. The counter-attack was scrapped, and so too was Galatas, its position being far too vulnerable to hold. Without Galatas the whole line was untenable and so the New Zealanders again retreated, forming a line from the coast to Perivolia and Mournies, near the Australian 19th Brigade.
North Africa
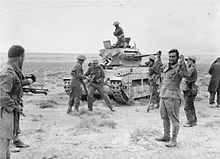
While New Zealand soldiers formed the majority of the personnel of the
On 18 November 1941,
On 14 June 1942, the generals recalled the New Zealanders from their occupation duties in Syria, as the Afrika Korps had
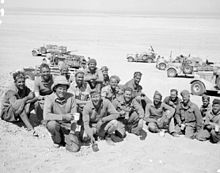
With the Eighth Army now under the new command of Lieutenant-General Bernard Montgomery, the Army launched a new offensive on 23 October against the stalled Axis forces in the Second Battle of El Alamein. On the first night, as part of Operation Lightfoot, the New Zealand 2nd Division, with British divisions, moved through the deep Axis minefields while engineers cleared routes for British tanks to follow. The New Zealanders successfully captured their objectives on Miteiriya Ridge. By 2 November, with the attack bogged down, Montgomery launched a new initiative to the south of the battle lines, Operation Supercharge, with the ultimate goal of destroying the Axis army. The experienced 2nd New Zealand Division was called on to carry out the initial thrust – the same sort of attack they had made in Lightfoot. As the under-strength division could not achieve this mission alone, two British brigades were attached. The German line was breached by British armour and, on 4 November, the Afrika Korps, faced with the prospect of complete defeat, skillfully withdrew.
The New Zealanders continued to advance with the Eighth Army through the
Italy
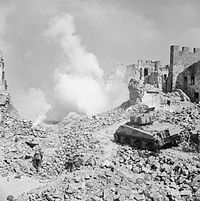
During October and November 1943, New Zealand troops from the 2nd New Zealand Division assembled in
Campaigns in the Pacific

When
Eventually, American formations replaced the New Zealand army units in the Pacific, which released personnel for service with the 2nd Division in Italy, or to cover shortages in the civilian labour force.[20] New Zealand Air Force squadrons and Navy units continued to contribute to the Allied island-hopping campaign, with several RNZAF squadrons supporting Australian ground troops on Bougainville.[21]
In 1945
The Commonwealth Corps, planned to participate in Operation Downfall, the Allied invasion of Japan, would have included New Zealand Army and Air Force units, with Air Force units included in Tiger Force to bomb Japan.
In 1945, some troops who had recently returned from Europe with the 2nd Division were drafted to form a contribution (known as
At the outbreak of war in 1939, New Zealand still contributed to the New Zealand Division of the Royal Navy. Many New Zealanders served alongside other Commonwealth sailors in vessels of the Royal Navy and would continue to do so throughout the war.
HMNZS Achilles took part in the Battle of the River Plate (13 December 1939) as part of a small British force against the German pocket battleship Admiral Graf Spee. The action resulted in the German ship retiring to neutral Uruguay and its scuttling a few days later.
Another cruiser,
On 13 December 1939, New Zealand deployed its naval forces against Germany. The first vessel into action against Japan, the minesweeper HMNZS Gale, steamed forward to Fiji, arriving on Christmas Day, 1941. HMNZS Rata and Muritai arrived in January 1942, followed by the corvettes HMNZS Moa, HMNZS Kiwi and HMNZS Tui, to form a minesweeping flotilla.
The Achilles, Leander, and
The Leander helped sink the Jintsu in the Battle of Kolombangara on the night of 11–12 July 1943. Holed by a Japanese torpedo during the engagement, the Leander withdrew to Auckland for repairs. Twelve New Zealand built Fairmile launches of the 80th and 81st Motor Launch Flotillas went forward in early 1944.
The cruiser
The Gambia represented New Zealand at the
Royal New Zealand Air Force in World War II
European theatre
On the outbreak of
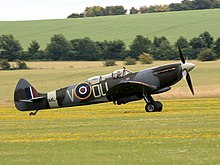
Many other New Zealanders also served in the RAF. As New Zealand did not require its personnel to serve with RNZAF squadrons, the rate at which they entered service was faster than for other Dominions. About 100 RNZAF pilots had been sent to Europe by the time the Battle of Britain started, and several had a notable role in it.[citation needed]
The RNZAF's primary role took advantage of New Zealand's distance from the conflict by training aircrew as part of the
New Zealand squadrons of the RAF

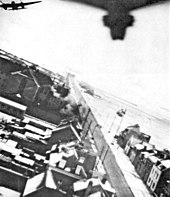
Once trained, the majority of RNZAF aircrew served with ordinary units of the RAF or of the
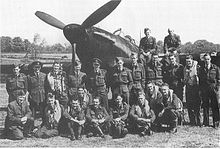
The Royal Air Force deliberately set aside certain squadrons for pilots from particular countries. The first of these,
RNZAF in the Pacific
The presence of German raiders led to the formation of New Zealand-based air-combat units – initially using re-armed types like the

In December 1941, Japan attacked and rapidly conquered much of the area to the north of New Zealand. New Zealand had perforce to look to her own defence as well as help the
The Imperial Japanese Navy demonstrated the vulnerability of New Zealand when submarine-launched Japanese float-planes overflew Wellington and Auckland in 1942. In March a Glen floatplane from I-25 overflew Wellington on 8 March and Auckland on 13 March, then Suva, Fiji on 17 March. The submarine was not seen by the Wellington-Nelson ferry when navigating Cook Strait on the surface on a full-moon night.[25] In May a floatplane from I-21 overflew Suva on 19 May and then Auckland on 24 May. Lost in heavy fog the pilot (Matsumora) was helped by airport staff who heard a plane apparently in trouble and turned on the runway lights so allowing the pilot to find his bearings.[26] During one March or May 1942 overflight a Tiger Moth apparently gave chase ineffectually.[citation needed]
As few combat-capable aircraft were available at home, and Britain was unable to help, New Zealand benefited from the British-United States
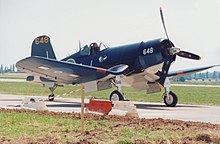
From mid-1943 at
The RNZAF took on a major part of the maritime reconnaissance task too, with
The role of the RNZAF changed as the allies moved off the defensive. The Americans, prominent amongst the Allied nations in the Pacific, planned to bypass major Japanese strongholds, but instead to capture a handful of island bases to provide a supply-chain for an eventual attack on Japan itself (see island hopping). The Allied advance started from the South Pacific. The RNZAF became part of the force tasked with securing the line of advance by incapacitating the bypassed Japanese strongholds.
As the war progressed, more powerful modern aircraft replaced the older types; Kittyhawks gave way to
Intelligence
New Zealand had a "Combined Intelligence Centre" in Wellington. In 1942 papers from the centre to the Commander-in-Chief,
In the 1930s the New Zealand Division of the Royal Navy established a chain of radio direction finding (D/F) stations from
New Zealand's network of radio intercept and D/F stations sent its material to Central Bureau in Brisbane despite its main area of responsibility being outside the SWPA.[30] The network was supplemented in 1943 by a Radio Finger-Printing (RFP) organisation staffed by members of the Women's Royal New Zealand Naval Service ("Wrens"). These were valuable for identifying Japanese submarines, and RFP alerted the minesweepers HMNZS Kiwi and HMNZS Moa, who attacked and rammed the Japanese submarine I-1 running supplies to Guadalcanal on 29 January 1943.[31]
In 1943 the New Zealand (naval) operation was run by a Lieutenant Philpott assisted by Professor Campbell (Professor of Mathematics at
Research
Several military research projects were conducted in New Zealand during World War II, notably a joint US/NZ project in 1944–45 called Project Seal to develop a tsunami bomb.[33]
See also
- Coastal Forces of the Royal New Zealand Navy
- Coastal fortifications of New Zealand
- List of New Zealand divisions in World War II
General topics
- Australian home front during World War II
- Equipment losses in World War II
- List of British Empire divisions in the Second World War
- Military history of Australia during World War II
- Military production during World War II
- Participants in World War II
- World War II casualties
References
Citations
- ^ "Impressions – Pilgrimage Cruise of the 28th | 28 Māori Battalion". 28maoribattalion.org.nz. Retrieved 3 December 2021.
- ^ "Fighting for Britain – Second World War – overview | NZHistory, New Zealand history online". www.nzhistory.net.nz. Retrieved 4 June 2016.
- ^ Hensley 2009, pp. 21, 22.
- The Dominion Post. Retrieved 19 April 2021.
- ^ The Empire and the Second World War Radio 4, episode 88
- ^ Hensley 2009, pp. 20–21.
- ^ "Proclamation on 4 September". Auckland Star/Papers Past. 4 September 1939.
- ^ McGibbon 2000, pp. 118–120.
- ^ Baker 1965, pp. 125–127.
- ^ Hensley 2009, p. 248.
- ^ Hensley 2009, p. 254.
- ^ Brookes 2016, pp. 282–283.
- ^ White, Tina (11 May 2019). "Remembering the land girls of World War II". Manawatu Standard. Retrieved 7 March 2020 – via Stuff.co.nz.
- ^ Ehrman Volume VI 1956, p. 222.
- ^ McClymont 1959, p. 487.
- ^ Davin 1953, Chapter: The Canea–Galatas Front.
- ^ Crawford 2000, pp. 140–162.
- ^ Hensley 2009, pp. 234, 254.
- ^ Hensley 2009, p. 235,237.
- ^ Crawford 2000, p. 157.
- ^ Bradley 2012, p. 395.
- ^ Hensley 2009, pp. 372.
- ^ Wood, F. L. W. (1958). "Photo: Air Vice Marshal L.M. Isitt Signing the Japanese Surrender at Tokyo Bay, September 1945". Title: Political and External Affairs. Wellington: Historical Publications Branch. Retrieved 24 November 2019.
- ^ McGibbon 2000, p. 8.
- ^ Jenkins 1992, pp. 147, 148.
- ^ Jenkins 1992, pp. 164, 165.
- ^ Elphick 1998, p. 262.
- ^ Bou 2012, p. 115.
- ^ Bou 2012, p. 18.
- ^ Bou 2012, p. 48.
- ^ Elphick 1998, p. 387.
- ^ Smith 2000, p. 198.
- ^ Leech 1950, p. [page needed].
Bibliography
- Baker, J. V. T. (1965). War Economy. Wellington: Historical Publications Branch.
- Bou, Jean (2012). MacArthur's Secret Bureau: The Story of the Central Bureau. Loftus, NSW, Australia: Australian Military History Publications. ISBN 978-0-9872387-1-9.
- ISBN 9781742372709.
- Brookes, Barbara (2016). A History of New Zealand Women. Bridget Williams Books. ISBN 978-0-90832-146-9.
- Crawford, John, ed. (2000). Kia Kaha: New Zealand in the Second World War. Auckland: Oxford University Press. ISBN 0-19-558438-4.
- Davin, Daniel (1953). "Crete". The Official History of New Zealand in the Second World War 1939–1945. Wellington: Historical Publications Branch.
- OCLC 217257928.
- Her Majesty's Stationery Office.
- Elphick, Peter (1998) [1997]. Far Eastern File: The Intelligence War in the Far East 1930–1945. London: Hodder & Stoughton. ISBN 0-340-66584-X.
- Hensley, Gerald (2009). Beyond the Battlefield: New Zealand and its Allies 1939–45. North Shore Auckland: Viking/Penguin. ISBN 978-06-700-7404-4.
- Jenkins, David (1992). Battle Surface! Japan's Submarine War Against Australia 1942–44. Sydney: Random House Australia. ISBN 0-09-182638-1.
- Leech, Thomas D.J (18 December 1950). Project Seal: The Generation of Waves by Means of Explosives. Wellington, N.Z.: Department of Scientific and Industrial Research. OCLC 31071831.
- McClymont, W. G. (1959). To Greece. OCLC 4373298.
- ISBN 0-19-558376-0.
- Slatter, Gordon (1995). One More River: The Final Campaign of the Second New Zealand Division in Italy. Auckland: David Ling. ISBN 0-908990-25-1.
- ISBN 0593-046412.
