
Road signs in Ecuador

Road signs in Ecuador are regulated in Manual Básico de Señalización Vial[1][2][3] and Reglamento Técnico Ecuatoriano. RTE INEN 004-1:2011. Señalización vial, which is based on the United States' Manual on Uniform Traffic Control Devices (MUTCD) originally developed by the Federal Highway Administration (FHWA).[4] Thus, road signs in Ecuador are similar in design to road signs used in the United States. One of the differences is that Ecuador uses the metric system, for example, vehicle speed is measured in km/h.[5]
Ecuador uses diamond-shaped warning signs on a yellow background in common with most of the rest of the Americas. One of the rare exceptions is the "Tramway crossing" warning sign used in the Cuenca Tramway, which has a triangular shape with a red border and white background, similar to warning signs used in Europe.[6] The regulatory and prohibitory signs are all of them rectangular, with the exception of the stop and the yield sign. Like Australia and the United States, the mandatory sign group is not used in Ecuador.
Ecuador signed the Vienna Convention on Road Signs and Signals on November 8, 1968 but has yet to fully ratify it.[7]
The suffix D means "right", from Spanish derecha, while the suffix I means "left", from Spanish izquierda.
Regulatory signs
Regulatory signs inform road users of the priorities in their use, as well as the existing prohibitions, restrictions, obligations and authorizations, the failure of which constitutes a traffic violation.
Most regulatory signs are rectangular in shape with the major axis vertical and have a border, legend and/or black symbols on a white background. Where possible, symbols and arrows are used to aid identification and clarify instructions.
Regulatory signs should generally be located on the right side of the road, but may be located on the left side or on both sides, to minimize the driver's perception and reaction time.
R1: Priority series
Priority signs are installed at the entrances to an intersection or at specific points where it is required to apply the regulations contained in these signs.


R2: Direction series
Direction signs obligate drivers to circulate only in the direction indicated by the arrows on the signs.
-
 R2-1I
R2-1I
One-way traffic to the left -
 R2-1D
R2-1D
One-way traffic to the right -
 R2-2
R2-2
Two-way traffic -
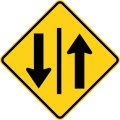
 R2-3
R2-3
Two-way traffic ahead -
 R2-4
R2-4
Give way to pedestrians -
 R2-5I
R2-5I
Keep left -
 R2-5D
R2-5D
Keep right -
 R2-6I
R2-6I
Keep left -
 R2-6D
R2-6D
Keep right -
 R2-7No entry
 -
 R2-8
R2-8
No U-turn -
 R2-9I
R2-9I
No left turn -
 R2-9D
R2-9D
No right turn -
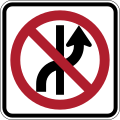
 R2-10
R2-10
No left or U-turn -
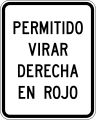 R2-11
R2-11
Right turn on red light permitted -
 R2-12I
No changing lanes to the left -
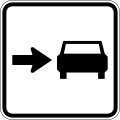
 R2-12D
No changing lanes to the right -
 R2-13
R2-13
No overtaking -
 R2-14a
Keep right -
 R2-14b
Buses keep right -
 R2-14c
Heavy vehicles keep right -
 R2-14d
Cycles keep right -
 R2-14e
Motorcycles keep right -
 R2-15I
Turn left only -
 R2-15D
Turn right only -
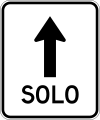 R2-16
R2-16
Go straight only -
 R2-17
R2-17
One way bifurcation -
 R2-18I
Optional left lane movement -
 R2-18D
Optional right lane movement -
 R2-19a
Advance lane control at intersection -
 R2-19b
Advance lane control at intersection -
 R2-19c
Advance lane control at intersection -
 R2-20
R2-20
Divided highway -
 R2-20a
Divided highway


R3: Movement restriction series
Movement restriction signs are used to prohibit the entry and/or circulation of the type of vehicle indicated in the symbol. It prohibits the continuation of the direct movement of the approaching vehicular or pedestrian flow, beyond the place where it is installed. It should be located where the driver or pedestrian can easily understand which road is prohibited from entering.
-
 R3-1
R3-1
No motor vehicles -
 R3-2
R3-2
No trucks -
 R3-3
R3-3
No buses -
 R3-4
R3-4
No tractors -
 R3-5
R3-5
No blocking intersection -
 R3-6
R3-6
No cycles -
 R3-7
R3-7
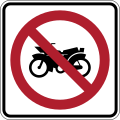
No motorcycles -
 R3-8
R3-8
No human-powered vehicles -
 R3-9
R3-9
No animal-drawn vehicles -
 R3-10
R3-10
No pedestrians -
 R3-11
R3-11
Buses only -
 R3-12a
Bikeway -
 R3-12b
Shared pedestrian and cycle path -
 R3-12c
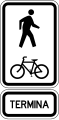
End of shared pedestrian and cycle path -
 R3-12d
Segregated pedestrian and cycle path -
 R3-12e
End of segregated pedestrian and cycle path -
 R3-13
R3-13
High-occupancy vehicle lane -
 R3-13a
End of high-occupancy vehicle lane


R4: Maximum limit series
-
 R4-1
R4-1
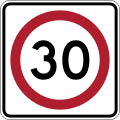
Speed limit (30 km/h) -
 R4-2
R4-2
LED lighting speed limit -
 R4-3
R4-3
End of speed limit -
 R4-4
R4-4
Reduce speed -
 R4-5
R4-5
Height limit -
 R4-6
R4-6
Width limit -
 R4-7
R4-7
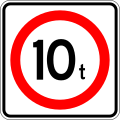
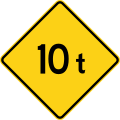
Weight limit -
 R4-8
R4-8
Axle weight limit -
 R4-9
R4-9
Vehicle length limit -
 R4-10
R4-10
Weight control


R5: Parking series
-
 R5-1
R5-1
Parking prohibited -
 R5-2
R5-2
Parking and stopping prohibited -
 R5-3
R5-3
Parking permitted -
 R5-4
R5-4
Toll parking area -
 R5-5a
R5-5a
Reserved parking for people with disabilities -
 R5-5b
R5-5b
Reserved parking for people with disabilities -
 R5-6
R5-6
Bus stop


R6: Complementary plate series
-
 R6-1a
R6-1a
Parking restriction to the right -
 R6-1b
R6-1b
Parking restriction to the left -
 R6-1c
R6-1c
Parking restriction to the left and right -
 R6-2d
R6-2d
Loading zone -
 R6-3
R6-3
The tow truck is working -
 R6-4
R6-4
Next km/h -

-
 R6-6
R6-6
Give way to the trolley


R7: Miscellaneous series
-
 R7-1
R7-1
No honking -
 R7-2
R7-2
Do not pick up or drop off passengers -
 R7-3a
R7-3a
Pedestrian crossing -
 R7-3b
R7-3b
Pedestrian crossing -
 R7-4I
R7-4I
Pedestrian crossing tunnel on the left -
 R7-4D
R7-4D
Pedestrian crossing tunnel on the right -
 R7-5
R7-5
Seat belt


Warning signs
Warning signs are used to alert drivers of potential dangers ahead. They indicate the need to take special precautions and require a reduction in traffic speed or some other maneuver. On urban roads they are installed at a minimum distance of 100 m before the danger and 150 m on rural roads (highways).
A warning sign should generally be placed on the right side of the roadway and arranged to convey its message in the most efficient manner, without lateral obstruction or restricted sight distance. However, in special circumstances, the sign or a duplicate may be placed on the left side of the roadway.
P1: Curve series
Curve signs are installed on approaches to horizontal curves. Selection depends on approach speeds and track geometry. If the curves are substandard, these signs must be complemented with the recommended R4-1 speed signs.
-
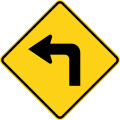 P1-1I
P1-1I
Curve to the left at 90 degrees and less -
 P1-1D
P1-1D
Curve to the right at 90 degrees and less -
 P1-2I
P1-2I
Open curve to the left -
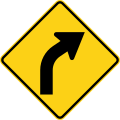 P1-2D
P1-2D
Open curve to the right -
 P1-3I
P1-3I
Multiple curves at 90 degrees and less, first to the left -
 P1-3D
P1-3D
Multiple curves at 90 degrees and less, first to the right -
 P1-4I
P1-4I
Multiple open curves, first to the left -
 P1-4D
P1-4D
Multiple open curves, first to the right -
 P1-5I
P1-5I
Series of sharp bends ahead, first to the left -
 P1-5D
P1-5D
Series of sharp bends ahead, first to the right -
 P1-6I
P1-6I
Hairpin curve to the left -
 P1-6D
P1-6D
Hairpin curve to the right -
 P1-7I
P1-7I
Loop curve to the left -
 P1-7D
P1-7D
Loop curve to the right


P2: Intersections and junctions series
Intersection and junction signs are used where the sight distance at the approach to an intersection or junction is less than the safe stopping distance, or where drivers may have difficulty appreciating the presence or configuration of an intersection located later. They are generally located on rural roads and on urban roads located in less urbanized areas.
-
 P2-1
P2-1
Crossroads ahead -
 P2-2
P2-2
T-junction ahead -
 P2-3
P2-3
T-intersection with a dual carriage way ahead -
 P2-4I
P2-4I
T-intersection with a curve (left) -
 P2-4D
P2-4D
T-intersection with a curve (left) -
 P2-5I
P2-5I
Side road left -
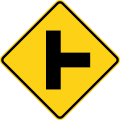 P2-5D
P2-5D
Side road right -
 P2-6I
P2-6I
Offset side roads (left) -
 P2-6D
P2-6D
Offset side roads (right) -
 P2-7
P2-7
Y-junction ahead -
 P2-8I
P2-8I
Merging traffic from the left ahead -
 P2-8D
P2-8D
Merging traffic from the right ahead -
 P2-9I
P2-9I
Intersection in curve (left) -
 P2-9D
P2-9D
Intersection in curve (right) -
 P2-10I
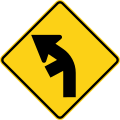
Curve with external side road (left) -
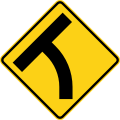
 P2-10D
Curve with external side road (right) -
 P2-11I
Curve with internal side road (left) -
 P2-11D
Curve with internal side road (right) -
 P2-12I
Curve with side roads (left) -
 P2-12D
Curve with side roads (right) -
 P2-13I
Curve with side roads (left) -
 P2-13D
Curve with side roads (right) -
 P2-14I
Intersection in curve (left) -
 P2-14D
Intersection in curve (right) -
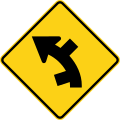
 P2-15I
Skewed side road on the left ahead -
 P2-15D
Skewed side road on the right ahead -
 P2-16I
Added lane on the left -
 P2-16D
Added lane on the right -
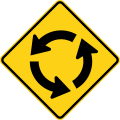 P2-17
P2-17
Roundabout ahead -
 P2-18
P2-18
Railway crossing ahead -
 P2-18a
Railway line number -
 P2-19a
Railroad crossing without gates -
 P2-19b
Railroad crossing without gates -
 P2-19c
Railroad crossing and intersection 90° (left) -
 P2-19d
Railroad crossing and intersection 90° (right) -
 P2-19e
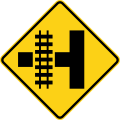
Railroad crossing and T-junction 90° (left) -
 P2-19f
Railroad crossing and T-junction 90° (right) -
 P2-19g
Angled railroad crossing (left) -
 P2-19h
Angled railroad crossing (right) -
 P2-19i
Angled railroad crossing (left) -
 P2-19j
Angled railroad crossing (right) -
 P2-20
P2-20
Railway line crossing with barrier and traffic lights


P3: Traffic control device approach series
-
 P3-1
P3-1
Stop sign ahead -
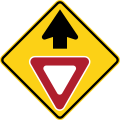 P3-2
P3-2
Give way sign ahead -
 P3-3
P3-3
Traffic lights ahead -
 P3-4
P3-4
Pedestrian crossing ahead


P4: Widths, heights, lengths and weights series
Widths, heights, lengths and weights signs warn the drivers of the existence of future limitations on the width, height, length and weight of the roadway.
-
 P4-1
P4-1
Narrow bridge ahead -
 P4-2I
P4-2I
Road widens on the left -
 P4-2D
P4-2D
Road widens on the right -
 P4-3
P4-3
Road widens on both sides -
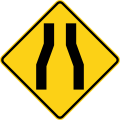 P4-4
P4-4
Road narrows on both sides -
 P4-5I
P4-5I
Road narrows on the left -
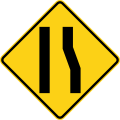 P4-5D
P4-5D
Road narrows on the right -
 P4-6
P4-6
Dual carriageway begins -
 P4-7
P4-7
Dual carriageway ends -
 P4-8
P4-8
Maximum width -
 P4-9
P4-9
Maximum height -
 P4-10
P4-10
Maximum vehicle length -
 P4-11
P4-11
Tunnel approach -
 P4-12
P4-12
Maximum weight


P5: Lane assignment series
Lane assignment signs warn the driver of approaching an assignment of traffic lanes on the roads; Red symbols and lines are used in situations of greater danger. It is recommended to accompany it with a complementary signal according to the circumstances.
-
 P5-1
P5-1
Lane merge -
 P5-2
P5-2
Two-way traffic -
 P5-3
P5-3
Two traffic lanes in one direction and one opposite -
 P5-4
P5-4
One traffic lane in one direction and two opposite -
 P5-5I
P5-5I
Left lane ends -
 P5-5D
P5-5D
Right lane ends -
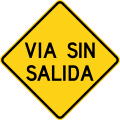 P5-6
P5-6
Dead end street


P6: Obstacles and special situations series
Obstacles and special situations signs warn the driver of the existence of future limitations on the width, height, length and weight of the roadway.
-
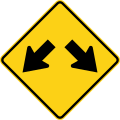 P6-1
P6-1
Diverge -
 P6-2
P6-2
Speed bump -
 P6-3
P6-3
Dip -
 P6-4
P6-4
Uneven road -
 P6-5a
P6-5a
Downhill slope -
 P6-5b
P6-5b
Uphill slope -
 P6-6I
P6-6I
Rockfall (left) -
 P6-6D
P6-6D
Rockfall (right) -
 P6-7
P6-7
Loose surface -
 P6-8
P6-8
Slippery road -
 P6-9
P6-9
Unprotected quay or river -
 P6-10
P6-10
End of paved road -
 P6-11
P6-11
Side winds -
 P6-12
P6-12
Agricultural machinery -
 P6-13
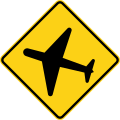
P6-13
Low-flying aircraft -
 P6-14
P6-14
Cyclists on the road -
 P6-15I
Bicycle crossing sign on side street (left) -
 P6-15D
Bicycle crossing sign on side street (right) -
 P6-16
P6-16
Road shared with cyclists -
 P6-17
P6-17
Animals on the road -
 P6-18
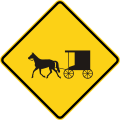
P6-18
Horse-drawn vehicle -
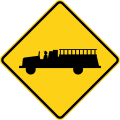 P6-19
P6-19
Fire vehicle


P7: Pedestrian series
-
 P7-1
P7-1
Pedestrians ahead -
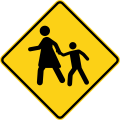 P7-2
P7-2
Children ahead -
 P7-3
P7-3
Playing zone ahead -
 P7-4
P7-4
Hospital


P8: Complementary signs
Complementary signs are to complement other signs with additional information through symbols and/or legends, they must be used according to the needs of the preventive messages to be implemented, they must be located under the preventive sign; except where otherwise indicated.
-
 P8-1
P8-1
Kilometers per hour -
 P8-2
P8-2
Meters -
 P8-3
P8-3
Kilometers -
 P8-4
P8-4
Next meters -
 P8-5
P8-5
Next kilometers -
 P8-6
P8-6
When raining -
 P8-7
P8-7
Parking -
 P8-8
P8-8
Blind people


Information signs
Information signs are used to orient and guide road drivers, providing them with the necessary information so that they can reach their destinations in the safest, simplest and most direct way as possible.
-
 I1-1a
I1-1a
Distance -
 I1-1b
I1-1b
Destination -
 I1-1c
I1-1c
Destination -
 I1-1d
I1-1d
Distance -
 I1-3ba
Names of streets and avenues (vehicular road sign) -
 I1-4C
I1-4C
Ramp speed limit -
 I1-4d
I1-4d
Exit speed limit -
 I1-4g
I1-4g
Toll prices -
 I1-4h1
Countdown marker (300 m) -
 I1-4h2
Countdown marker (200 m) -
 I1-4h3
Countdown marker (100 m) -
 I2-5
I2-5
Parking zone -
 I2-5
I2-5
Parking zone with distance (500 m) -
 I2-6I
I2-6I
Parking zone on the left -
 I2-6D
I2-6D
Parking zone on the right -
 I2-7a
I2-7a
Gas station with distance -
 I2-7b
I2-7b
Toll service sign with distance -
 I2-8a
I2-8a
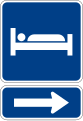
Rest area/hotel to the right -
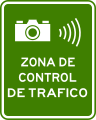 I3-1
I3-1
Traffic enforcement camera control zone -
 I3-3
I3-3
Control of weights and dimensions -
 Kilometer sign
 -
 Kilometer sign
 -
 Pan-American Highway sign
 -
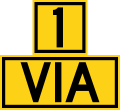
 Ecuadorian primary highway marker


.svg)


Temporary signs
Temporary signs and/or devices for road works and special purposes warn road users of temporary hazardous conditions, which may affect users, workers and warn road users of temporary hazardous conditions, which may affect users, workers and equipment used in equipment used in the works.
-
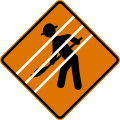
 T1-1
T1-1
Roadworks ahead -
 T1-2
T1-2
Traffic control flagger ahead -
 T1-3
T1-3
Construction vehicle on the road -
 T1-4a
T1-4a
Roadworks ahead -
 T1-5a
T1-5a
Bridgework ahead -
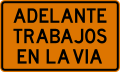 T1-4b
T1-4b
Roadworks ahead (plaque) -
 T1-5b
T1-5b
Bridgework ahead (plaque) -
 T1-6
T1-6
Next XX km roadworks -
 T2-1a
T2-1a
Road closed -
 T2-1b
T2-1b
Road closed (plaque) -
 T2-2I
T2-2I
Left lane closed -
 T2-2D
T2-2D
Right lane closed -
 T2-3a
T2-3a
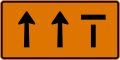
Lane closed (right) -
 T2-3b
T2-3b
Lane closed (left) -
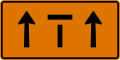 T2-3c
T2-3c
Lane closed (center) -
 T3-1a
T3-1a
Detour XX m -
 T3-1b
T3-1b
Detour XX m (plaque) -
 T3-2a
T3-2a
Detour ends -
 T3-2b
T3-2b
Detour ends (plaque) -
 T3-3aI
Detour to the left -
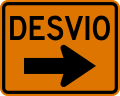 T3-3aD
Detour to the right -
 T3-3bI
Detour to the left -
 T3-3bD
Detour to the right -
 T4-1
T4-1
Fresh asphalt -
 T4-2
T4-2
Gravel road -
 T4-3
T4-3
Water on the road -
 T5-1
T5-1
Roadwork ends (plaque) -
 T5-2
T5-2
Roadwork ends


School zone signs
School zone signs warn and inform road users of the approach to an educational center and the priorities in the use of the same, as well as the existing prohibitions, restrictions, obligations and authorizations, the non-compliance of which is considered a violation of traffic laws and regulations.
The school zone is defined as the radius of influence of a given educational center, which is a minimum of 200 metres (0.12 mi). This radius of influence must be increased according to the road geometry, the sector where the educational center is located, its capacity and the educational level it serves, which may be classified as preschool, school, middle school, etc.
-
 E1-1
E1-1
School zone ahead -
 E2-1
E2-1
Hours -
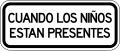 E2-2
E2-2
When the children are present -
 E2-3
E2-3
Days of the week -
 E2-4
E2-4
Flashing lights -
 E2-5
E2-5
School zone -
 E2-6
E2-6
Precaution -
 ER1-1
ER1-1
School zone speed limit (30 km/h) -
 ER1-2
ER1-2
School zone speed limit with flashing lights (30 km/h) -
 ER2-5
ER2-5
Bus stop in school zone -
 ER3-1
ER3-1
End of school zone


References
- ^ "manual de señalizacion | PDF | Semáforo | Autobús". Scribd. Retrieved 2023-12-22.
- ^ https://dspace.utpl.edu.ec/bitstream/123456789/11467/1/Carpio%20Reyes%20Henrry%20Omar.pdf
- ^ "Manual Basico de Senalizacion Vial | PDF | Semáforo | Peatonal". Scribd. Retrieved 2023-12-22.
- ^ "Reglamento Técnico Ecuatoriano. RTE INEN 004-1:2011. Señalización vial. Parte 1: Señalización Vertical" (PDF). www.obraspublicas.gob.ec (in Spanish). Instituto Ecuatoriano de Normalización. 2011. Retrieved 2023-12-22.
- ^ "LIBRO A. NORMA PARA ESTUDIOS Y DISEÑOS VIALES. NORMA ECUATORIANA VIAL" (PDF). www.obraspublicas.gob.ec (in Spanish).
- ^ Telégrafo, El (2018-10-08). "Semaforización se toma las avenidas de Cuenca". El Telégrafo (in European Spanish). Retrieved 2024-01-30.
- ^ "United Nations Treaty Collection". treaties.un.org. Retrieved 2023-12-10.
External links
- Reglamento_Tecnico_Ecuatoriano_SENALIZACION_VIALparte1_1a40.pdf
- Reglamento_Tecnico_Ecuatoriano_SENALIZACION_VIALparte2_41a90.pdf
- Reglamento_Tecnico_Ecuatoriano_SENALIZACION_VIALparte3_91a130.pdf
- Reglamento_Tecnico_Ecuatoriano_SENALIZACION_VIALparte4_131a170.pdf
- Reglamento_Tecnico_Ecuatoriano_SENALIZACION_VIALparte5_171a220.pdf
- Reglamento_Tecnico_Ecuatoriano_SENALIZACION_VIALparte6_221a270.pdf
- Reglamento_Tecnico_Ecuatoriano_SENALIZACION_VIALparte7_271a320.pdf
- Reglamento_Tecnico_Ecuatoriano_SENALIZACION_VIALparte8_320a380.pdf
- Reglamento_Tecnico_Ecuatoriano_SENALIZACION_VIALparte9_381a436.pdf